Home Blog Page 14

What Is ISTA 1A? A Detailed Look at the ISTA 1A Packaging Test Procedure

0
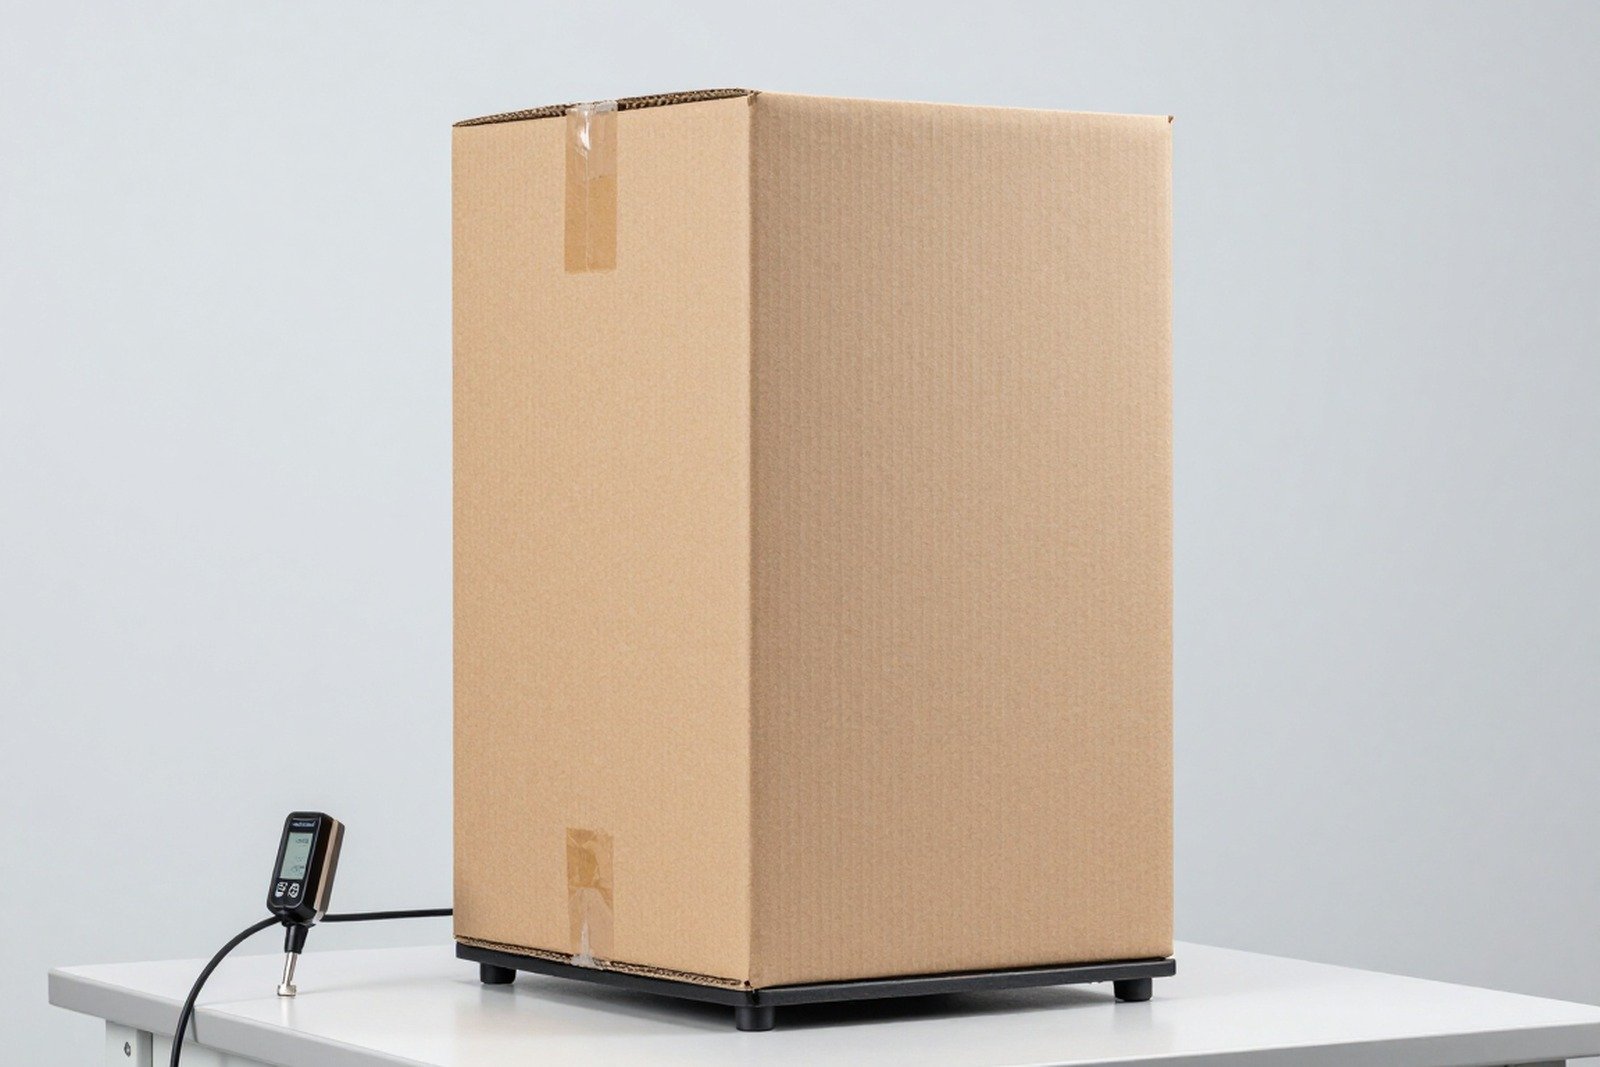
Cover image of the article «What Is ISTA 1A? A Detailed Look at the ISTA 1A Packaging Test Procedure» — illustration of transport packaging testing to the ISTA standard

In the ISTA® set of shipping packaging testing standards, 1A is the most mentioned process: fastest, cheapest, most accessible. And because of that, this is the most misunderstood process. Many businesses hold the result of “passing ISTA 1A” and commit to their partners that the goods will not be damaged during transportation – a conclusion that the standard itself does not make.

This article analyzes ISTA 1A in exactly the way the standard positions itself: what it measures, what it does not measure, when it should be used, and when it is mandatory to switch to another procedure.

1. What is ISTA 1A?

ISTA (International Safe Transit Association) divides testing procedures into several series (series) according to the level of realistic simulation. ISTA 1A belongs Series 1 — Non-Simulation Integrity Performance Test, roughly translated as non-simulated integrity performance testing.

Two keywords to know:

  • Integrity — test to evaluate the overall durability of the assembly product + packaging. The standard states clearly: product and packaging are considered together, not separate. You don’t test “the carton”, you test “the carton with the product inside”.
  • Non-simulation (non-simulation) — the test produces standardized mechanical stress, no recreate a specific transportation journey.

ISTA states two main uses for 1A: evaluating the protective performance of a package, and relative comparison between different packaging or product design options. The second purpose is where 1A promotes its greatest value.

2. Most common misunderstanding: 1A does not simulate real shipping

Right at the beginning of the entire Series 1, ISTA states three things straight: these tests challenge product and packaging tolerance; them no is to simulate realistic transportation hazards; and them not of course Comply with packaging regulations of shipping companies.

The practical consequences need to be clearly stated to customers and internally:

  • Reach 1A no This means that the goods will be intact when passing through the parcel delivery network.
  • Reach 1A no supersedes the requirements of large retailers/e-commerce platforms (which typically require Series 3 or Series 6).
  • Reach 1A no must be a travel document for the carrier.

The standard further notes that certain transportation conditions—humidity, pressure, or unusual handling operations—can no is within the scope of process coverage.

An easy way to visualize: 1A is like a standard fitness test, not a race on the exact track that the athlete will compete on. It tells you if the platform is okay, but it doesn’t predict the outcome of the race.

3. Scope of application

  • Subject: The individual packaged-product has been completely packaged and ready to be sent.
  • Volume: total package weight of 68 kg (150 lb) or less.
  • Exception: Packages located on visible skids or pallets and weighing more than 45 kg (100 lb) may be tested under procedure 1B or 1E instead of 1A.
  • Not applicable for a unitized pallet load — that case belongs to 1E.

4. What tests does Procedure 1A include?
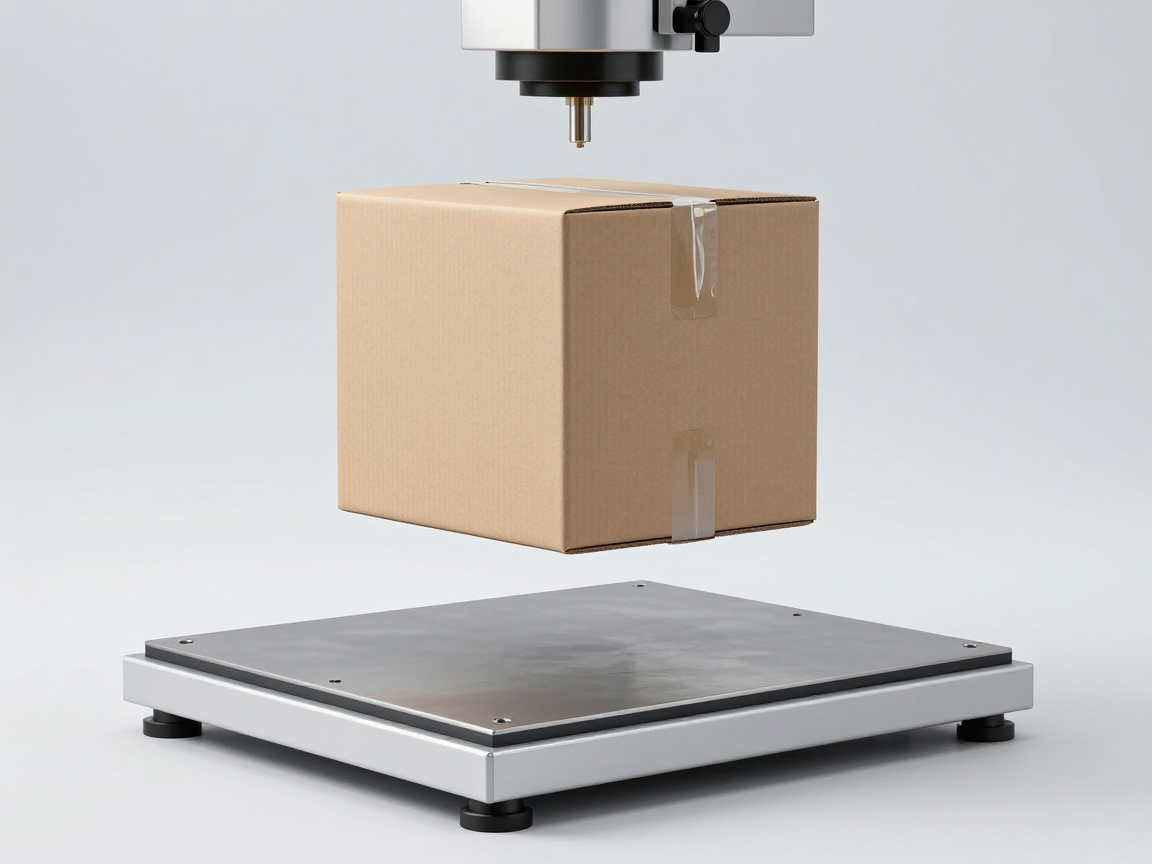
Illustration of the «Process 1A includes» section of the article «What is ISTA 1A? Detailed analysis of the ISTA 1A packaging testing process»
Illustration of the section «Process 1A includes».

ISTA 1A is a series of three blocks of performance testing in the correct order on the same sample. The sample should not be “rested” or replaced — cumulative damage is part of the test.

1. Atmospheric preconditioning

The package is kept at laboratory temperature and humidity for a specified period of time before testing. Temperature and humidity shall be recorded at the beginning and end of the test.

Important note: this is Conditioning in lab environment conditions, not a climate chamber with heat and humidity control. Climate chambers are a feature of the Series 2 and Series 3. If your product is sensitive to humidity (paper packaging in a tropical climate, for example), the 1A won’t give you that answer.

2. Fixed Displacement Vibration

The package is placed on a vibrating table that vibrates at a fixed amplitude. The technician gradually increases the frequency until the bale begins to bounce off the table — this is verified by sliding a thin metal rod under the bottom of the bale. The test duration is calculated from the number of target impacts divided by the frequency just determined. With the rotary vibrating table, the package must be rotated horizontally in the middle of the test.

What does this test simulate? The bouncing phenomenon repeats thousands of times on the truck floor. It attacks: the strength of the seals and case staples, the abrasion resistance of the dunnage material, the tightness of the product in the cavity, and the joints of the product itself.

3. Shock

The default method is free fall. When dropping in a certain direction is not feasible (bale is too large, too heavy, unusual shape), the standard allows replacement with inclined impact (incline impact / conbur) or horizontal impact (horizontal impact) with equivalent velocity.

Drop height — or equivalent impact velocity — gradually decreases with bale volume: the heavier the bale, the lower the test level, because in reality the loader does not lift heavy bales as high as light bales.

The falling chain is designed logically from the weakest point out: starting at one corner (the most vulnerable angle, or a default angle if not yet determined), then the edge radiate from that corner in order from short to long, finally one after another face from small to large. The entire series executes on the same pattern.

What does this test simulate? Manual loading and unloading operations — falling off the conveyor belt, slipping out of hands, hitting the side of the vehicle.

About equipment

The standard cites the corresponding ASTM methods for each type of equipment: ASTM D 999 for vibration systems; ASTM D 5276 (free fall), D 5487 (shock machine), D 880 (tilt impact), D 4003 (horizontal impact) for shock section. This is the first question that should be asked of any testing laboratory: which ASTM method does your equipment comply with?

5. Sample preparation and sample quantity
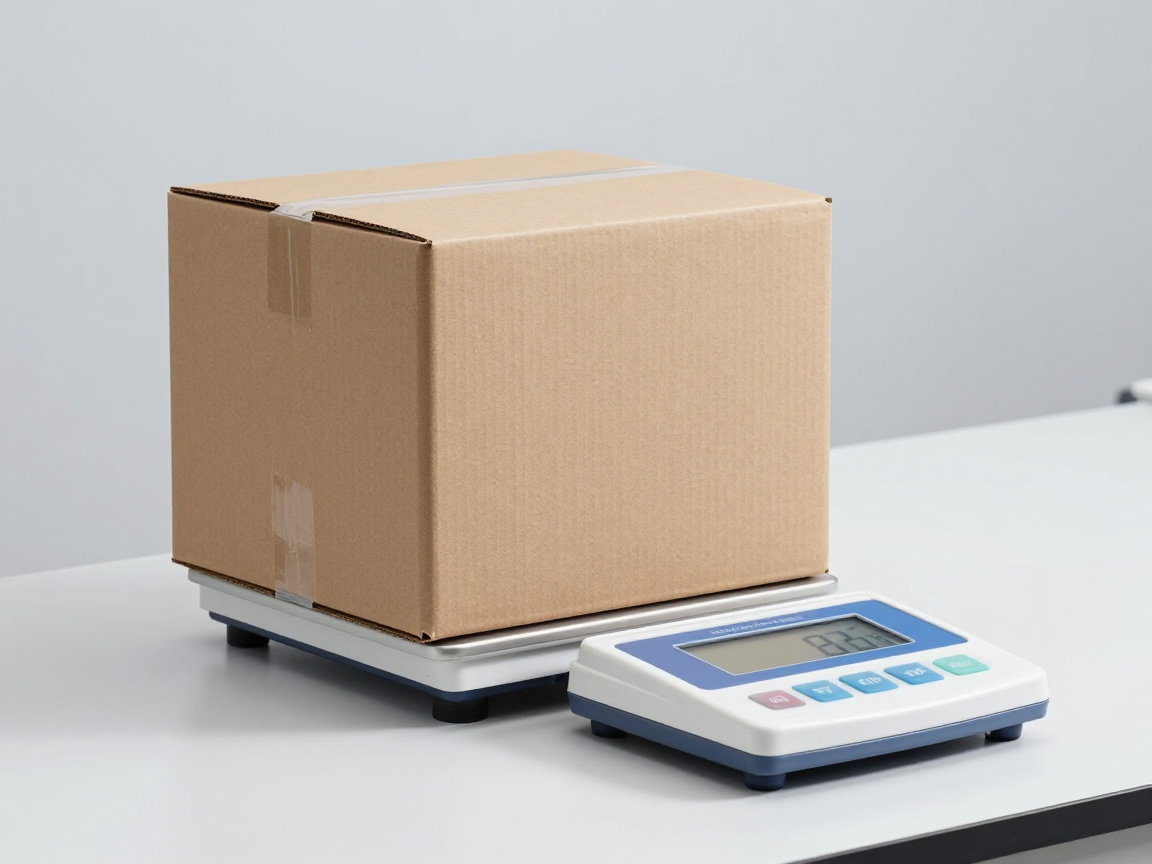
Illustration of the «Sample preparation» section of the article «What is ISTA 1A? Detailed analysis of the ISTA 1A packaging testing process»
Illustration of the «Sample preparation» section.
  • Minimum 1 sample is enough to complete the process.
  • However ISTA It is recommended to repeat the procedure 5 times or more, using a new sample each time, so that the results are representative enough. A single sample gives you a data point, not a statistical conclusion.
  • Samples must be of the product and packaging Real, untested. If not available, the replacement sample must be as identical as possible to the genuine product.

The most valuable warning in this section: The standard states that a package that has undergone shipping is no longer considered to be in its standard condition. Therefore, the sample sent to the laboratory must be outer packaging (over-pack) in a separate protective carton, or Repackage with new packaging right in the testing room.

This is the most common and costly mistake we see: businesses send samples to the lab in the same packaging to be tested. The bale traveled several hundred kilometers before the test began — the results after that no longer said anything about the packaging design.

6. Reading and understanding the results: who decides “pass”?

This is the most important and most overlooked part. ISTA 1A does not have a pre-defined definition of passing. The standard stipulates that the shipper — the business, not the testing laboratory — must determine before testing four things:

  1. What is considered product damage?
  2. Damage tolerance level Which are acceptable, if any?
  3. Correct method What is the way to determine product condition at the end of testing?
  4. Packaging condition Which is acceptable at the end of testing?

Without this set of four criteria, the test report only stops at the description: “box with dented corners, tape partially peeled off, product has no visible damage”. Someone still has to decide whether this is a pass or a fail — and that someone is you, not the lab.

Additional note: packaging is deformed no automatically fail. A dented carton but the product is intact and the box is still eligible for delivery to the customer can be completely satisfactory — if the criteria you set from the beginning allow it.

7. Compare 1A with 1B, 1C and 1G

These four processes belong to Series 1 and are easy to confuse. The difference lies in three axes: bale weight, vibration type, and whether or not compression is added.

ProcedureSubjectVibration typeShock/impactHave you tried compression?
1ASingle piece ≤ 68 kgFixed displacementFree fall (or alternative impact)No
1BSingle package > 68 kgFixed displacementImpact + rotating edge dropNo
1CSingle piece ≤ 68 kgSelect: fixed or randomSame as 1AYes (compression conditioning before vibration)
1GSingle piece ≤ 68 kgRandom (random vibration)Same as 1ANo

How to choose quickly:

  • Want to use vibrate randomly instead of fixed displacement vibration → use 1G, not 1A. Random vibration is more realistic because it excites a whole range of frequencies simultaneously, instead of a single resonant frequency.
  • Need further verification compression resistance (stacking in warehouse, stacking in containers) → use 1C. Note that the standard states that compression in 1C is a step conditioning before vibration and shock, is not a compression performance test and cannot be used to predict stackability in storage.
  • Sue weighs more than 68 kg → use 1B.

8. When is 1A enough — and when should 2A or 3A be used?

Standard 1A itself provides two very specific redirection instructions:

  • Goods for international distribution → consider ISTA 2A (Partial Simulation — partial simulation). 2A additional conditioning in a climate chamber with controlled heat and humidity, post compression, and two Vibration cycle clamps the shock test in the middle. This is a reasonable choice for export goods traveling by sea or through many different climates.
  • Goods go through the parcel delivery system (parcel delivery) → consider ISTA 3A (General Simulation — general simulation). 3A classifies bales into four shapes (standard, small, flat, long), uses random vibration spectra built from actual measurement data on vehicles and airplanes, has multiple fall sequences and the option of testing at low pressure to simulate altitude. If your goods go through parcel delivery networks, 3A is the one that accurately reflects reality.

1A is suitable when: you are in the early R&D stage and need to quickly compare several dunnage options; you need a low-cost internal validation benchmark before investing in real-world testing; or the contract/customer specifically designates 1A.

1A is not suitable when: partners request their standards (Series 6 for some major retailers); Air cargo and pressure elements; High-value, fragile goods need evidence close to the actual itinerary to negotiate insurance or damage liability.

9. Seven common mistakes with ISTA 1A

  1. Consider “reaching 1A” as a commitment to no damage. The standard itself says it does not simulate reality.
  2. Send the sample to the lab in the same packaging to be tested. Samples must be wrapped or repackaged at the lab.
  3. Failure criteria to be determined before testing. The results will be inconclusive.
  4. Just try one sample and then finalize the design. ISTA recommends five or more times.
  5. Confusing 1A with 1G or 1C. These three processes yield three different types of evidence.
  6. Use 1A results for 3A or Series 6 capital requirements. Will be rejected at the supplier approval stage.
  7. Change the packaging after testing without testing again. Changing carton suppliers, reducing paper weight, changing insert materials — any change invalidates the old results.

10. What does the cost and time of ISTA 1A testing depend on?

There is no universal price for ISTA 1A, as costs vary according to:

  • Package size and weight — the larger the goods, the more appropriate lifting equipment, floors and securing devices are needed; This part sometimes takes on a larger proportion than the test itself.
  • Select the shock test option — drop, incline impact or horizontal impact; Not all laboratories have all three devices.
  • Number of iterations — 1 sample as minimum requirement, or 5 samples or more as recommended by ISTA. This is often the factor that causes costs to increase the fastest.
  • Atmospheric conditioning time before entering the test sequence.
  • Sample preparation costs — over-packed to send to the testing room, or repackaged in new packaging at the testing room.
  • Reporting requirements — the level of data granularity to be captured and the reporting format required by the end customer or carrier.

Regarding time, ISTA does not publish a standard number for a test — the actual time depends on the above variables (number of samples, number of iterations, atmospheric conditioning time, laboratory equipment schedule). How to get the real number: send the same request to two laboratories and ask for a quote with completion time for parallel comparison.

11. Frequently asked questions

How is ISTA 1A different from ISTA 1B?

The main difference is volume threshold: 1A for packages up to 150 lb (68 kg), 1B for packages over 150 lb (68 kg). Regarding the sequence, 1B has additional items Rotational Edge Drop for heavy loads — 1A does not have this step.

How is ISTA 1A different from ISTA 1C?

Same mass group (up to 68 kg), but 1C is an extended test: more categories compression conditioning and allows random vibration selection. If your goods are stacked in multiple layers in a warehouse or container, 1C provides closer evidence — while 1A only answers the question of underlying mechanical strength.

Is ISTA 1A a certification?

No. 1A is testing procedure; The result is a report indicating whether or not the sample met the specified test levels. If you want to use the results for the program ISTA Certification, the test needs to be performed at an ISTA-accredited laboratory, in the correct order and with all required items.

How many samples are needed for one ISTA 1A test?

Minimum requirements are 1 sample. ISTA recommends implementation 5 times or more with new samples each time for representative conclusions. A single sample gives you a data point, not a statistical conclusion.

Does “Reach 1A” mean that the goods will not be damaged during transportation?

No. ISTA itself states Series 1 no simulation Realistic shipping hazards. A “pass” result only indicates that the sample withstood the specified test sequence — not a guarantee that the item will arrive intact. To assess the risk of damage on a specific trip, simulation procedures (3 Series group) or 2 Series are needed.

My goods are on pallets, what process should I use?

If the package is on a visible skid or pallet and weighs more than 100 lb (45 kg), the standard allows testing according to 1B or 1E instead of 1A. If the row has been fixed into a unitized load, the correct direction is ISTA 1E, or ISTA 3E When you need a simulation for full pallet goods.

Does ISTA 1A replace carrier requirements?

No. The ISTA document states that Series 1 does not automatically comply with carrier packaging regulations. The alternative test procedure (if any) must be approved by the requesting party — the end customer or carrier —.

12. Conclusion

1A is the fundamental endurance test for single packages of 68 kg or less, consisting of three steps: atmospheric conditioning, stationary vibration and shock. It does not simulate a real shipping journey, so a “pass” result is not a guarantee that the item will arrive intact. The real value of 1A lies elsewhere: it turns the ambiguous question “Is this packaging okay?” into a repeatable measurement that can be used to compare packaging options under the same conditions.

So the decision is not whether to run 1A or not, but to choose the right procedure for the actual distribution channel of the shipment — 1G if random vibration is needed, 1C if compression testing is needed, 2A for international distribution, 3A for parcel delivery — and define yourself in writing what constitutes damage before the sample leaves the factory.

References

Read more: ISTA 1G — random vibration version for packages up to 150 lb (68 kg) · ISTA 1E — process for unitized loads · ISTA 1D — compression expansion process for packages over 150 lb (68 kg) · ISTA standards — overview of shipping packaging testing · Complete article on ISTA standards · What is ISTA 2A? Partially simulated packaging test procedures for packages up to 150 lb (68 kg) · What is ISTA 2B? Partially simulated packaging test procedures for packages over 150 lb (68 kg) · ISTA Series 1 — 7-process overview (1A–1H)

Talk to us


    Disclaimer and IP acknowledgement

    This article is an explanatory content compiled by us for the purpose of introducing and disseminating knowledge. This article is not a translation, copy, abbreviation or replacement of the original standard, and is not reviewed, approved or sponsored by ISTA (International Safe Transit Association).

    The entire content of ISTA standards is copyrighted by the International Safe Transit Association, Inc. (East Lansing, Michigan, USA) — All rights reserved. ISTA® and the ISTA logo are registered trademarks of the International Safe Transit Association, Inc.; Mentioned in this article are for guidance purposes only and do not imply any affiliation, partnership or sponsorship.

    The content of the article is for reference only; Before applying for any purpose — testing, evaluation, certification or commercial decision-making — the reader should refer directly to the original ISTA document (the most complete and up-to-date version) and consult an accredited testing facility when necessary.

    When performing testing, it is mandatory to use the official, current version of the standard, obtained directly from ISTA. We do not redistribute ISTA materials in any form. Information in this article may be out of date with the current version of the standard.

    See more: Copyright Policy & Disclaimer by ticforall.com.
    Conditioning Before a Packaging Test: 12 Hours or 72 Hours?

    0
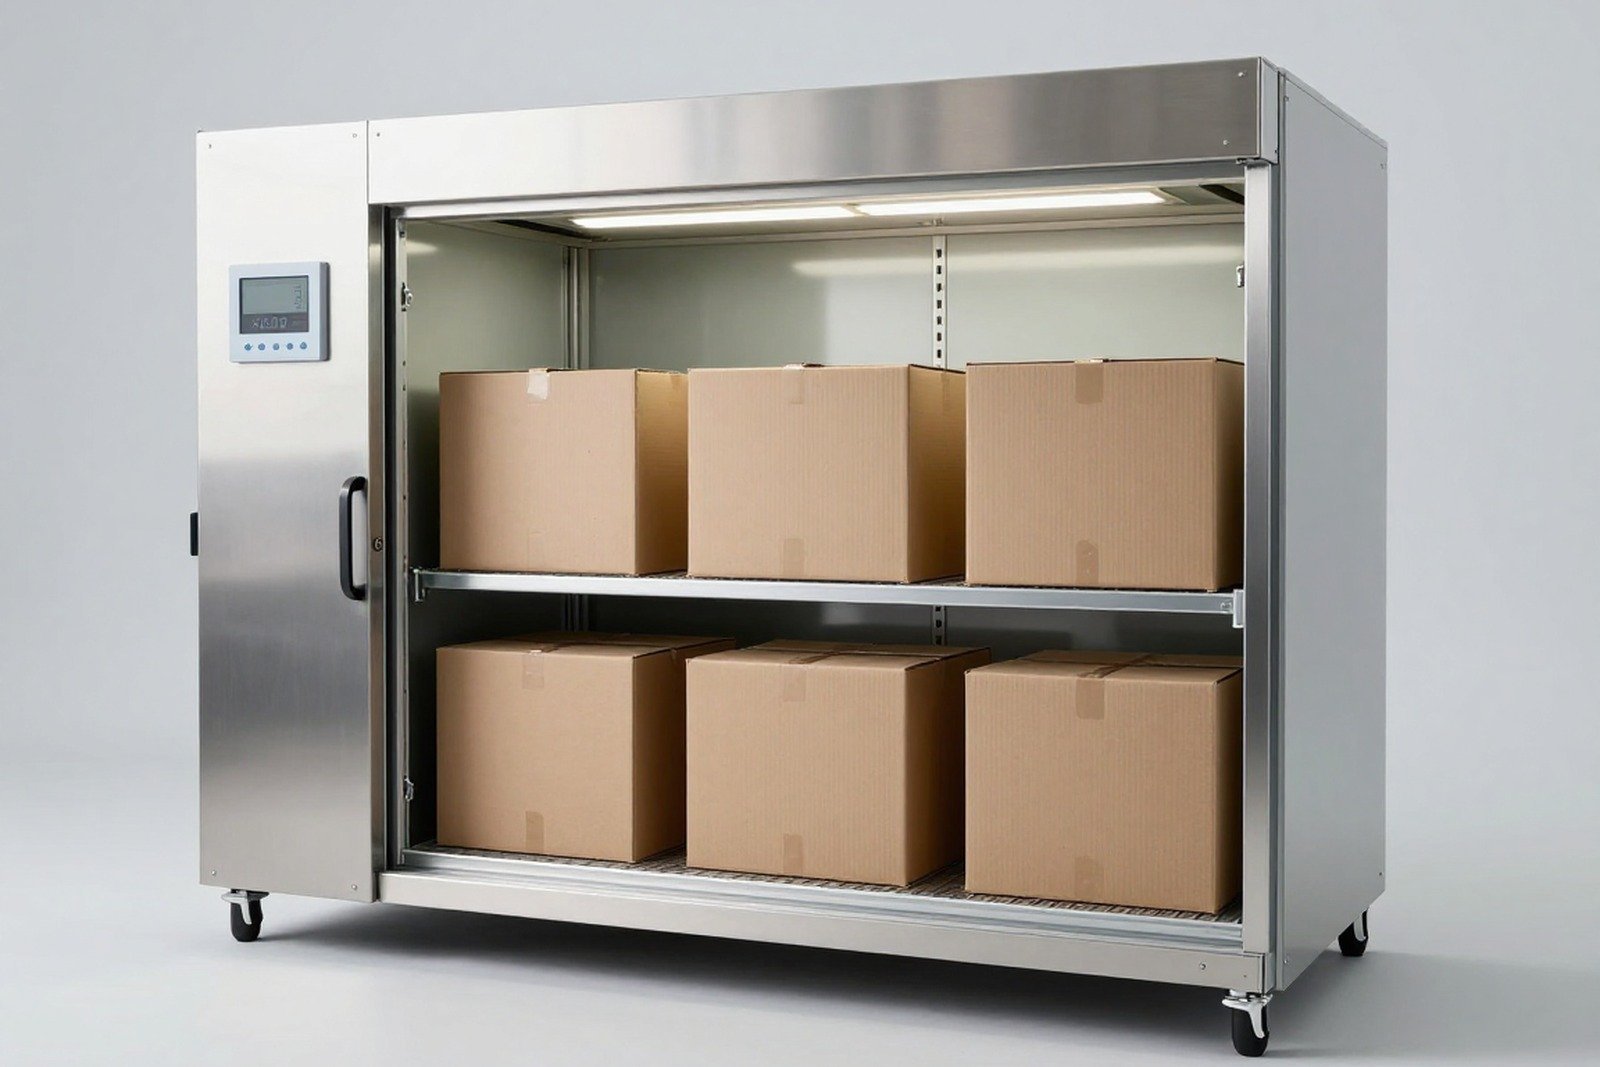
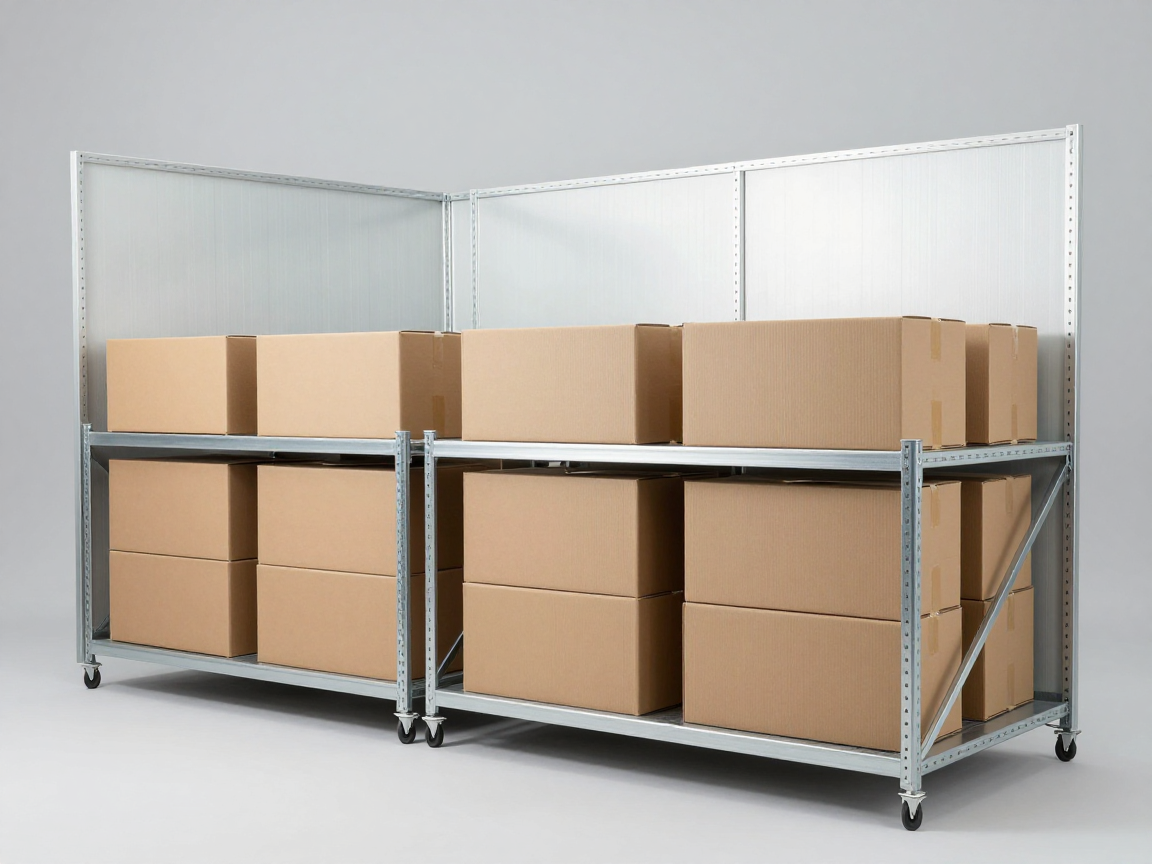
    Inside the climate control chamber with unlabeled brown cartons on metal shelves and temperature and humidity display — climate control cover photo before testing the packaging

    In most ISTA packaging test reports, the first part is always atmospheric conditioning (atmospheric conditioning). Many businesses consider this a “wait and see” step and don’t pay attention — while this is the step that determines whether the results reflect reality or not.

    This article compiles harmonic numbers from popular ISTA procedures, to answer three questions: How often, under what conditions, and when is it required?.

    1. Two easily confused concepts: preconditioning and conditioning

    ISTA documents use two different terms, often in the same Test Block but with completely different roles:

    Concept Name in the document Conditions Role
    Preconditioning Preconditioning Temperature and humidity of the lab, not tightly controlled Bring the sample to a stable state, eliminating the influence of the environment where the sample is stored/sent
    Controlled conditioning Atmospheric Conditioning Temperature and humidity choose according to the table, with tolerance Simulates the harsh climatic conditions the cargo will encounter

    These two steps do not replace each other. Controlled conditioning is always performed later Preconditioning, not replacing it. Confusing these two concepts is the most common reason why test records are evaluated as incomplete.

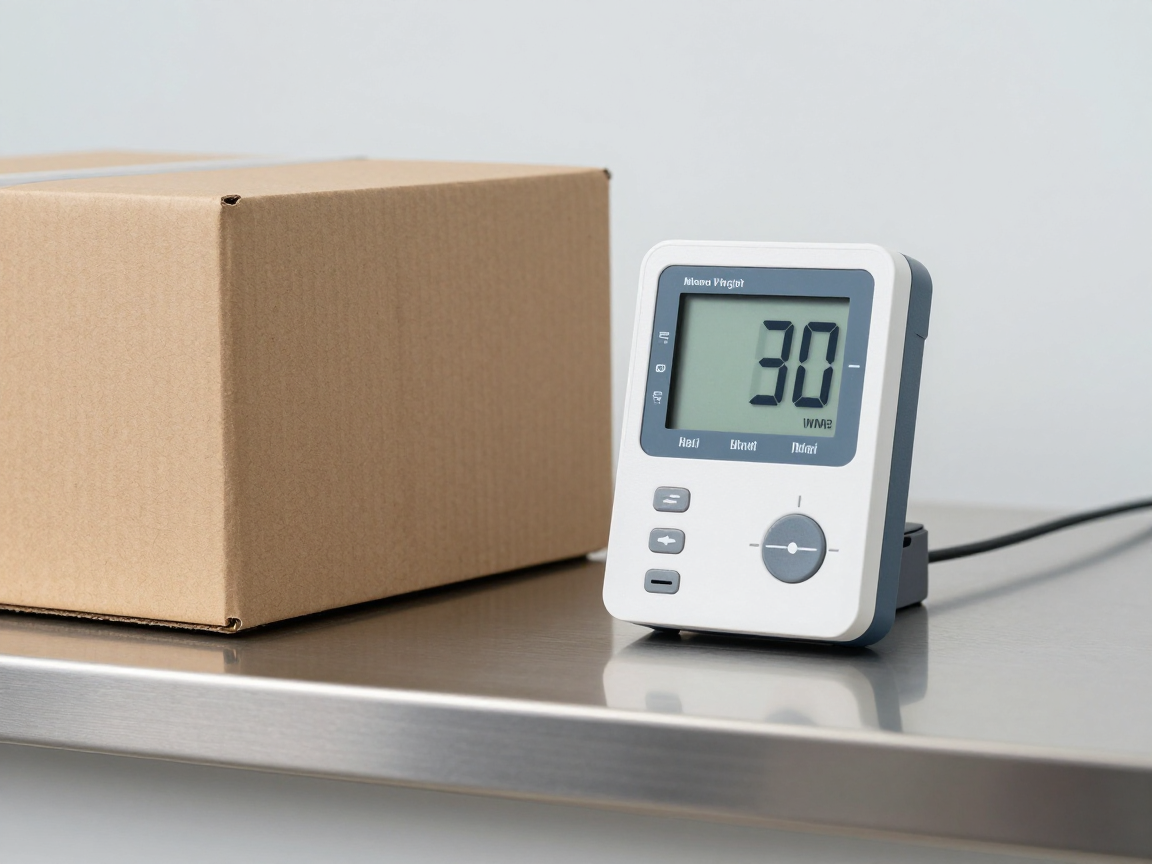
    Thiết bị ghi nhiệt độ và độ ẩm kỹ thuật số đặt trên bàn phòng thí nghiệm cạnh một thùng carton nâu không nhãn
    Preconditioning and controlled conditioning are two separate steps: the laboratory temperature and humidity must be recorded at the beginning and at the end of the entire test.

    2. Preconditioning: a common number is 12 hours

    For most processes, the preconditioning time is 12 hours at laboratory temperature and humidity, at level required. The table below shows the procedures directly compared to the documentation:

    Procedure Preconditioning Required?
    ISTA 1B, 1C Lab temperature and humidity, 12 hours Required
    ISTA 3F, 3H Lab temperature and humidity, 12 hours Required
    ISTA 3L Lab temperature and humidity, 12 hours Required
    ISTA 6-AMAZON.COM Over Boxing Lab temperature and humidity, 12 hours Required
    ISTA 6-AMAZON.COM SIOC Lab temperature and humidity, 12 hours Required
    ISTA 6-SAMSCLUB Lab room temperature and humidity, at least 12 hours Required (when required by process)

    A small but important detail: the 6-SAMSCLUB document says “not less than twelve (12) hours” — that is, 12 hours is minimum level, not a fixed number. If the sample is in cold or hot storage for a long time, 12 hours may not be enough for the sample to come into equilibrium with the lab.

    3. Two notable exceptions

    ISTA 3K — conditioning by distribution channel, not by lab

    3K is the procedure for fast-moving consumer goods in European retail chains, so pre-conditioning is associated here sales channel of the product rather than a general level:

    Distribution and retail channels Minimum time Temperature Humidity
    Ambient (normal temperature) — general retail 12 hours 23 °C 50% RH ± 5%
    Chilled (cool) 12 hours 2 to 8 °C Uncontrolled RH
    Frozen (frozen) 12 hours −18 °C Uncontrolled RH

    The 3K document clearly states the selection principles: cool, air-conditioned goods in cool conditions; The temperature is normally conditioned at standard laboratory conditions; Air-conditioned frozen goods in frozen conditions. Choosing the wrong channel is choosing the wrong harmonic — and the results are no longer valid for that actual channel.

    ISTA 7D — 24 hours, and possibly longer

    Because 7D only measures temperature, conditioning here is longer: minimum 24 hours for the product and each packaging component. The document also notes something very practical: if used frozen gel pack or ice pack, possible thermal stabilization time longer than 24 hours, especially when they are frozen in their own shipping containers instead of individually. See details in the article What is ISTA 7D?

    4. Controlled conditioning: almost always 72 hours

    Unlike preconditioning, controlled conditioning is usually prolonged 72 hours and is selected from a table of Anticipated Conditions. The table below is a summary of the content, appearing almost intact in the 3F, 3H, 3L and 6-AMAZON.COM Over Boxing processes:

    Conditions Time Temperature Humidity
    Extreme Cold (extreme cold) 72 hours −29 °C (−20 °F) Uncontrolled RH
    Severe Cold (severe cold) 72 hours −18 °C (0 °F) Uncontrolled RH
    Cold, Humid (cold, damp) 72 hours 5 °C (40 °F) 85% RH ± 5%
    Controlled Conditions (lab conditions) 72 hours 23 °C (73 °F) 50% RH ± 5%
    Hot, Humid (hot, humid) 72 hours 38 °C (100 °F) 85% RH ± 5%
    Hot, Humid then Extreme Heat, Moderate RH 72 hours then 6 hours 38 °C then 60 °C (140 °F) 85%RH then 30%RH
    Elevated Temperature (high heat) 72 hours 50 °C (120 °F) Uncontrolled RH
    Extreme Heat, Dry (extreme heat and dryness) 72 hours 60 °C (140 °F) 15% RH ± 5%
    User Defined High / Low / Cycle 72 hours According to the known conditions of the business

    The last three lines are for businesses to define themselves, based on the known conditions of the actual distribution route. This is often the best option when a business has journey data — but it’s also the option that requires the most preparation, as the basis for the number must be proven.

    Các thùng carton nâu không nhãn xếp trong phòng điều hoà khí hậu với tường kim loại và màn hình hiển thị nhiệt độ độ ẩm
    Controlled conditioning simulates extreme climate conditions, typically 72 hours; If more than one condition is selected, each condition must be a new and complete test.

    5. So is controlled conditioning mandatory or optional?

    In most procedures, the line “Atmospheric Conditioning — Controlled Temperature and Humidity” is clearly stated Optional (optional), while the “Preconditioning” line is Required (required). But you need to read the explanation, because the document clearly states two points:

    • If you know that Climatic extremes are harmful to the product, must be used Maximum temperature and humidity limits of product.
    • Documents It is recommended to use both the highest and lowest levels — that is, run two conditioning series, each with a full test.

    For goods that are perishable at temperature (food, cosmetics, pharmaceuticals, battery-powered electronics), skipping this step is skipping the biggest risk. Conversely, with climate-resistant goods, this is a step that can be cut to save chamber time — as long as the decision is documented and both parties agree.

    As for 6-SAMSCLUB, the document has clear optiones: groups non-perishable (not perishable), controlled conditioning is optional; group perishable (perishable) goes straight to the mandatory option.

    6. Why does the conditioning change the test results?

    Two technical reasons, both very specific:

    • Carton and humidity: Paper materials absorb and release moisture according to the environment. At high humidity, paper fibers soften and their ability to withstand compression decreases; At low humidity, paper is drier and more brittle. So the same carton may reach 50% RH but not 85% RH. This is why the “Cold, Humid” and “Hot, Humid” conditions in the table both use 85% RH.
    • Heat sensitive products: Many products change their properties with temperature — adhesives soften when hot, liquids increase in vapor pressure, batteries lose capacity when cold, plastics become brittle at low temperatures. A product that passes the fall test at room temperature may not pass at −29 °C.

    So conditioning is not a formal procedure: it is the variable that creates the difference between “passing in the lab” and “passing in the market”.

    7. Three rarely mentioned rules – but get them wrong and the test means nothing

    1. Run the rest as quickly as possible after exiting the conditioning chamber. The document requires performing the remaining exercises immediately after removing the sample from the conditioning equipment; If possible, perform directly in a conditioned environment. Leaving the sample waiting outside the lab for several hours will invalidate the entire conditioning step.
    2. One condition = one new and complete test. If more than one condition is selected, each condition must run a complete series of tests with new samples, and cannot reuse samples that have already been tested.
    3. Record temperature and humidity at two times. Documentation required to record lab temperature and humidity when starting try and record when finished the entire test procedure. This is data to demonstrate valid test conditions; Without it, the report is unlikely to be accepted.
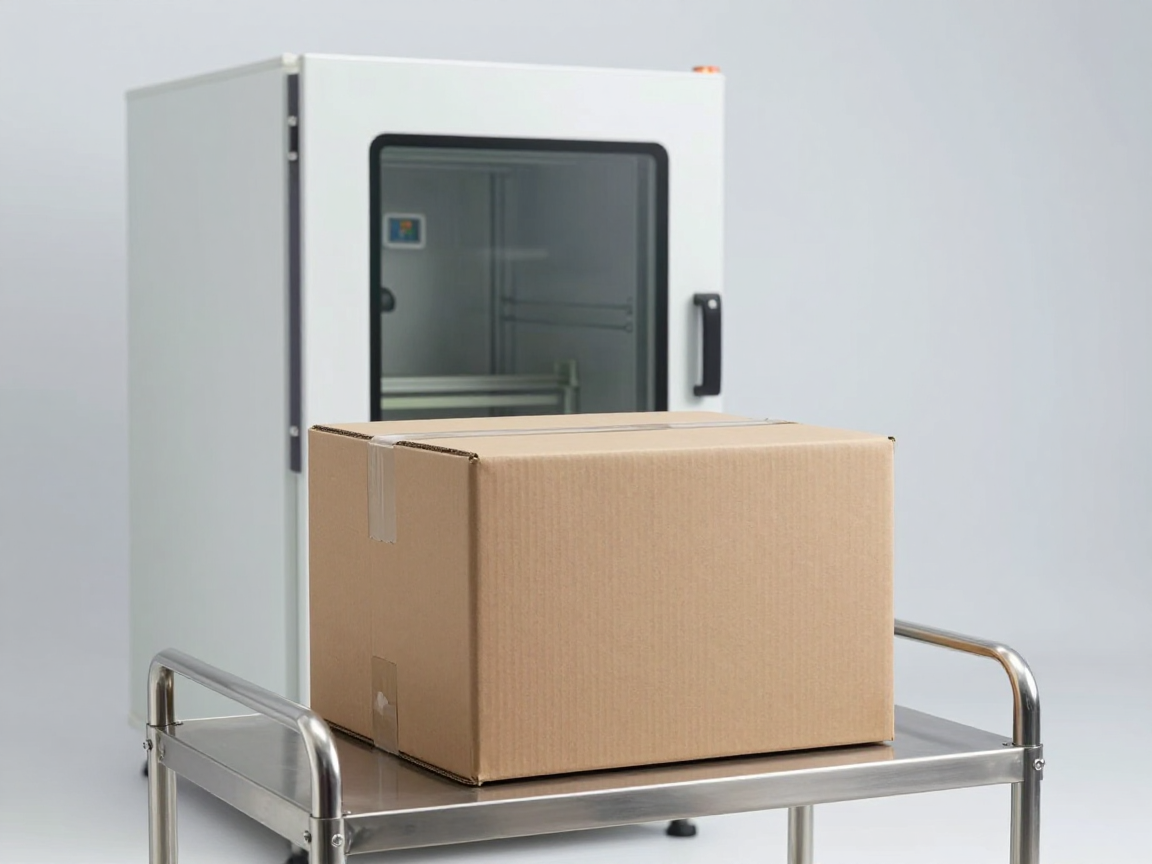
    Thùng carton nâu không nhãn vừa được lấy ra khỏi buồng điều hoà, có màn hình nhiệt độ độ ẩm phía sau
    The three rules that are easiest to violate: run the rest immediately after exiting the chamber; Each condition is a new test; and record temperature and humidity at both beginning and end.

    8. Common errors

    1. Conflate preconditioning with atmospheric conditioning. Two different steps; Controlled conditioning always does later Preconditioning, no replacement.
    2. Consider 12 hours as a fixed number for all cases. There is a “not less than 12 hours” recording procedure (6-SAMSCLUB) and there is a 24-hour requirement procedure (7D).
    3. Choose an conditioning that does not follow the actual distribution channel. With 3K, the ambient/cool/frozen channel determines the conditioning conditions.
    4. Let the cool/warm sample return to the lab before testing. Must move on to the next lesson immediately, as quickly as possible.
    5. Reuse the tested sample for different conditions. Each condition requires a new sample and a complete test series.
    6. Do not record the temperature and humidity of the lab. This is required data in the report.
    7. Do not check the calibration of the recording device. Temperature and humidity measuring equipment and conditioning equipment must be calibrated before testing.
    8. Skip conditioning for heat-sensitive goods to save time. This is often the product’s biggest risk — saving a few days in the test chamber but losing the value of the entire record.
    9. The selected standard version and conditions are not clearly stated in the report. Readers of the records need to know exactly what conditions were adjusted.

    9. Frequently asked questions

    Is 12-hour preconditioning required?

    Yes. In most of the collated procedures, the line “Preconditioning — Temperature and Humidity — Ambient” is recorded at Required. Only in some special cases is it listed as optional (such as the preconditioning step in the test sequence table of ISTA 7D).

    Can I skip controlled conditioning to save time?

    Formally, much of this step recording process is optional. But if the product is known to be affected by temperature or humidity, the literature calls for the highest limit to be used — and recommends using both the highest and lowest limits. Ignoring knowing the risks is a decision that needs to be documented and agreed upon by both parties.

    Conditioning is at which step in the test sequence?

    Yes step 1 (and sometimes step 2) in the test sequence table, before any shock, vibration and compression tests. With 3K, conditioning is still the first step — but the condition is chosen according to the product’s distribution channel.

    How to prepare samples sent to the lab?

    Documentation of sample request sent to an accredited laboratory must over-packaged or Repackage in new packaging at the lab, to ensure the tester is in perfect condition. Details in the article Number of samples and sample preparation when testing ISTA packaging.

    Does conditioning change the test?

    Don’t change the test, but change the input conditions — so the results can be changed. That’s the goal: to bring the sample into the state it would actually encounter in the market before being subjected to shock, vibration and compression.

    10. Conclusion

    Climate control involves two steps and both have a reason to exist: Preconditioning for 12 hours in a laboratory environment (mandatory, and “not less than 12 hours” in some procedures), then comes 72-hour controlled conditioning according to expected conditions table (optional in form, but often practically required for heat-sensitive goods — and option-mandated for perishable goods in 6-SAMSCLUB).

    Three things to remember: Conditioning conditions must match the actual distribution channel (3K is the best example: ambient / cool / frozen); After leaving the room, you must continue running immediately; and Each conditioning condition requires a new, complete test. Noteworthy time exceptions: 7D lasts for a minimum of 24 hours, and frozen gel packs may take longer.

    Reference standard version: the figures in the article are compared with ISTA documents 1B (2014), 1C (2014), 3F (2017), 3H (2025), 3K (2011), 3L (2023), 6-AMAZON.COM Over Boxing (2018), 6-AMAZON.COM-SIOC (2018), 6-SAMSCLUB (2010) and 7D (2007).


    References

    The full standard should be searched and ordered directly from ISTA. Below are the public sources used for reference when compiling the article:

    • ISTA — Test Procedures & Projects (current catalog, accessed September 28, 2026)
    • ISTA 3F (2017), 3H (2025), 3L (2023), 6-AMAZON.COM Over Boxing (2018) — “Anticipated Conditions” / “Optional Conditions” table
    • ISTA 3K (2011) — preconditioning by distribution and retail channels
    • ISTA 7D (2007, revised 7/2022) — minimum 24-hour preconditioning
    • ASTM D4332 and ISO 2233 — referenced methods for temperature and humidity recorders and conditioning chambers

    Related articles


    Talk to us


      Disclaimer and IP acknowledgement

      This article is an explanatory content compiled by us for the purpose of introducing and disseminating knowledge. Article is not a translation, copy, abridgement or replacement of the parent standard, and is not evaluated, approved or sponsored by ISTA (International Safe Transit Association)..

      The entire content of ISTA standards is copyrighted by the International Safe Transit Association, Inc. (East Lansing, Michigan, USA) — All rights reserved. ISTA® and the ISTA logo are registered trademarks of the International Safe Transit Association, Inc.; Mentioned in this article are for guidance purposes only and do not imply any affiliation, partnership or sponsorship.

      The figures in this article are a summary for reference and may have been adjusted in a newer version of the standard. Article content For reference only; Before applying for any purpose — testing, evaluation, certification or commercial decision-making — the reader should refer directly to the original ISTA document, and consult an accredited testing facility when necessary.

      When performing testing, it is mandatory to use the official, current version of the standard, obtained directly from ISTA. We do not redistribute ISTA materials in any form.

      See more: Copyright Policy & Disclaimer by ticforall.com.

      What Drives the Cost and Lead Time of an ISTA Packaging Test?

      0
      Cover image of the article «What does the cost and time of ISTA packaging testing depend on?» — illustrates testing of shipping packaging according to ISTA standards

      “How much does an ISTA test cost?” is a question with almost no general answer. Not because testing laboratories hide prices, but because No test is the same as another: for the same ISTA 1C, two businesses can receive two very different quotes depending on the package size, number of samples and test option chosen.

      This article summarizes the factors that really determine cost and time, and how to ask for quotes to compare between units.

      1. Why is there no “standard price” for a test?

      ISTA is a standards developer, not a seller of testing services — ISTA does not publish a price list for performing a procedure. Costs are determined by each testing laboratory, based on equipment time, human resources, consumables and the level of documentation required by the customer.

      So instead of finding a number, the practical way to do it is to understand What causes price quotes to increase? — then proactively choose the configuration that suits your goals.

      2. Five factors that determine cost

      Ảnh minh hoạ phần «Năm yếu tố» của bài «Chi phí và thời gian thử nghiệm bao bì ISTA phụ thuộc vào gì?»
      Illustration of the «Five Elements» section.
      • Process is selected: Series 1 (durability testing) procedures typically have fewer items than Series 2 and Series 3 (partial simulation and general simulation). The more items on the same model, the longer the equipment occupancy time.
      • Weight and size of package: bales over 68 kg (150 lb) require lifting equipment, heavy-duty vibrating tables, and sometimes have to rent a vehicle and load separately. Bulky packages also take up a lot of test chamber space.
      • Number of samples and number of iterations: the minimum requirement is usually one sample per run, but ISTA recommends multiple iterations with new samples to obtain representative conclusions. This is the biggest variable that businesses can proactively determine.
      • The test option is selected: multiple processes allow a choice of options for the same item — for example, fixed displacement or random vibration, free fall impact, incline or horizontal impact. Each option uses different equipment so prices are different.
      • Documentation requirements: descriptive reports are usually cheaper than reports with detailed data, systematic images or content for certification. If the end customer has its own report form, it should be sent when asking for price.

      3. Time: why is it difficult to promise a number?

      Ảnh minh hoạ phần «Thời gian» của bài «Chi phí và thời gian thử nghiệm bao bì ISTA phụ thuộc vào gì?»
      Illustration of the «Time» section.

      The time to complete a test is not just the running time. It includes climate conditioning time (if required by the process), time occupying the vibrating table or impact device, inspection and imaging time between steps, and equipment schedule wait time. For heavy goods, additional loading and unloading work at both ends is required.

      One point that’s easy to overlook: with a multi-item process running consecutively on the same sample, if a problem arises in the middle step, you have to start over with a new sample — the actual time may be longer than planned. So you should ask the testing lab Estimated completion time is calculated in working days, and ask clearly what to do if you have to try again.

      4. How to get quotes that are comparable between units

      To have two quotes for the same thing, submit a single descriptor for both places, including:

      • Standard procedures and codes (e.g. ISTA 1C), with optional optiones you want to use.
      • External dimensions, weight, and packaging configuration of the sample.
      • Desired number of samples and iterations.
      • Document request: regular report or report according to customer’s form.
      • Your set of pass/fail criteria — see 4 criteria businesses must determine for themselves before testing.

      When getting a quote, you should clearly ask three things that are often hidden: Does the price include climate control?, Is loading and unloading labor and lifting equipment included?, and Does it include retesting if the sample fails in the middle step?.

      5. Four ways to reduce costs without reducing value

      • Try it out early in the design phase: The cost of repairing packaging while still on the drawing is always lower than the cost of handling damaged goods on the market.
      • Choose the right process according to the real distribution channel: try again because choosing the wrong process is much more costly than identifying the right channel in the first place.
      • Decide on the number of iterations based on risk: High value products, sold through strict channels, should be repeated enough; Replaceable products and packaging that have been stable over multiple batches can start with fewer iterations.
      • Finalize pass/fail criteria before testing: This is the cheapest way to avoid having results but still having to try again because both sides understand “pass” differently.

      6. Conclusion

      The cost and time of an ISTA test is not a fixed number but is the result of five decisions: procedure, package size and weight, sample number, test arm, and record level. If you want to compare quotes, you must send the same description to the units and ask clearly about easily hidden items such as climate control, loading and unloading costs and retesting costs.

      The real way to save doesn’t lie in bargaining, but in working try the correct procedure the first time and finalize pass/fail criteria before the sample leaves the factory.

      References

      The full standard should be searched and ordered directly from ISTA. Below are the public sources used for reference when compiling the article:

      This explanatory article is compiled from the sequence and equipment sections of the ISTA Series 1–3 overviews; ISTA standards do not publish a price list for testing.

      Related articles:


      Talk to us


        Disclaimer and IP acknowledgement

        This article is an explanatory content compiled by us for the purpose of introducing and disseminating knowledge. Article is not a translation, copy, abridgement or replacement of the parent standard, and is not evaluated, approved or sponsored by ISTA (International Safe Transit Association)..

        The entire content of ISTA standards is copyrighted by the International Safe Transit Association, Inc. (East Lansing, Michigan, USA) — All rights reserved. ISTA® and the ISTA logo are registered trademarks of the International Safe Transit Association, Inc.; Mentioned in this article are for guidance purposes only and do not imply any affiliation, partnership or sponsorship.

        Article content For reference only; Before applying for any purpose — testing, evaluation, certification or commercial decision-making — the reader should refer directly to the original ISTA document (the most complete and up-to-date version) and consult an accredited testing facility when necessary.

        When performing testing, it is mandatory to use the official, current version of the standard, obtained directly from ISTA. We do not redistribute ISTA materials in any form. Information in this article may be out of date with the current version of the standard.

        See more: Copyright Policy & Disclaimer by ticforall.com.
        ISTA Packaging Test Pass/Fail Criteria: 4 Things You Must Decide Yourself

        0
        Cover image of the article "Pass/fail criteria when testing ISTA packaging: 4 things businesses must determine for themselves" — illustration of testing shipping packaging according to ISTA standards

        A packaging testing report is only truly valuable when it answers the question: Is this packaging pass or fail? It’s worth noting that the ISTA® standard doesn’t answer that question for you. The standard prescribes the test sequence, test levels, and equipment — but the judgment of what constitutes “failure” and what constitutes “pass” rests with the shipper, your business.

        This article explains the four points you must settle before the sample leaves the factory, and how to write them into the test requirements so the testing department doesn’t have to figure it out themselves.

        1. Why does the standard not pre-define what “pass” means?

        The regulatory part of the standard must be common to all types of products, so it can only be descriptive how to test, impossible to describe What is broken?. A 10 mm long scratch on an electronics box and a 10 mm long scratch on an interior wood panel have completely different meanings. At the same level of dented corners, some products are considered defective, some products are still sold normally.

        Practical consequences: the testing laboratory can only report the observed condition — “the box has a dented right corner, the tape is partially peeling off, the product has no visible damage to the naked eye”. The report is not pass or fail, because the tester does not know what level is acceptable for your product.

        If you don’t finalize the criteria in advance, one of two things will happen: some people think “it’s still acceptable, the product can still be sold”, others think “it’s a mistake if it’s dented” — and both sides fight over emotions. The expensive test results then become meaningless in the very debate it was designed to resolve.

        2. The standard requires the shipper to determine two things

        Ảnh minh hoạ phần «xác định hai điều» của bài «Tiêu chí đạt/không đạt khi thử nghiệm bao bì ISTA: 4 điều doanh nghiệp phải tự xác định»
        Illustration of the «determine two things» part.

        In the description of the scope of each process, the ISTA standard states that shipper — and not the testing laboratory — must determine:

        • Product damage tolerance level (product damage tolerance) — how much damage is allowed to the product.
        • Packaging condition is acceptable at the end of the test (acceptable package condition at the conclusion of the test).

        The standard also directs readers to ISTA’s own guidance document on how to select and use processes and projects. In other words, this isn’t a secondary detail — it’s a formal requirement, it’s just stated in one sentence so it’s easy to miss when a business only reads the test sequence.

        In fact, for the above two things to work, you need to concretize them into the four points below.

        3. Four points businesses must determine for themselves before testing

        Ảnh minh hoạ phần «Bốn điểm doanh nghiệp» của bài «Tiêu chí đạt/không đạt khi thử nghiệm bao bì ISTA: 4 điều doanh nghiệp phải tự xác định»
        Illustration of the section «Four business points».

        3.1. What is product damage?

        This is a definition, not a numerical threshold. You should distinguish three groups and clearly state which group is considered an error:

        • Functional damage: the product no longer functions properly — machine does not start, structure is unstable, welds are cracked.
        • Structural damage: cracked, bent, deformed, broken parts — even when the machine is still running.
        • Bonded damage: scratches, dents, dirty, chipped paint — the most controversial group, because it depends on the seller and the distribution channel.

        For cosmetic damage, state observable threshold instead of speaking in general terms. For example: “scratch on the front surface up to 10 mm, not penetrating the paint layer: not counted as damage”; “Corner dents deeper than 2 mm regardless of location: counted as damage”.

        3.2. Acceptable damage tolerance level

        There are products that must be achieved not damaged — usually high-end electronic goods, goods with medical requirements. Some products accept slight dents because the packaging is designed to “sacrifice” instead of the product. Both are correct, as long as it is stated clearly up front.

        Quantify as much as possible: how many damage points per sample are acceptable, how many samples are allowed to have damage in a repeat series, and where damage is especially serious (for example, the display surface when on the shelf).

        3.3. Method for determining product condition after testing

        If the criteria are good but the testing method is vague, the results will still be inconsistent. Need to close:

        • Check when: after each test step, or just after the end of the entire sequence.
        • Who checks?: testing laboratory specialist, business representative present, or both parties check and sign together.
        • Where to check?: just observe the outside, or open the packaging, remove the product and test its functions.
        • What evidence must be saved?: photos taken of six sides before and after the test, close-up photos of damage details, minutes signed by both parties.

        In fact, photos of the original condition are the cheapest and most useful evidence — without them, no one can prove whether the dent came before or after testing.

        3.4. What packaging condition is considered acceptable?

        This is the most overlooked point. Packaging exists to absorb damage on behalf of the product, so “dented packaging” is normal. It is necessary to clearly state which criteria are important:

        • Still keep the product: not so open that the product can fall off or lose accessories.
        • There is also identification information: barcodes, batch labels, warnings are still readable.
        • There is also the ability to stack If goods must be stored in warehouses or containers.
        • Acceptance threshold for each type of damage: torn, dented, damp, glue peeling, dislocated product inside.

        If a customer requires packaging to be “as good as new,” it should be bluntly stated that that criterion is nearly impossible to meet with shipping simulation testing — and will cause every test to yield a “fail” result.

        4. How to write four criteria into test requirements

        The above four points should be submitted at the same time as requesting a quote, not after the results come out. A short form to fill out right away:

        • Product and packaging configuration: product name, packaging code, type of insert material.
        • Definition of damage: which group is considered an error, observable threshold.
        • Tolerance accepted: number of allowed damage points, particularly serious locations.
        • Test method: time of inspection, person checking, level of disassembly, evidence that must be saved.
        • Packaging condition is acceptable: threshold for each type of loss and remaining required items (label, barcode).
        • Confirmer: full name, title, date — so that later no one says “didn’t know this criterion”.

        When placing an order, the testing laboratory should be requested Record this set of criteria verbatim in the report and clearly state that the report does not include a pass/fail conclusion. Thus, the report retains its technical value, while the commercial conclusion lies on the business side – exactly as expected.

        5. Three common mistakes

        • Let the testing laboratory decide “pass” on its own.. Many testing units will write “pass” for convenience, but that conclusion has no basis in your records, and the end customer has the right to not accept it.
        • Qualitative criteria (“not damaged”, “packaging is good”). These phrases cannot be verified, so each time you read the results you have to debate them from the beginning.
        • Change the criteria after knowing the results. If you see a dented sample and then change the criteria to “accept slight denting”, the entire evidentiary value of that test is lost, and the next test is no longer reliable.

        6. Frequently asked questions

        Does the testing laboratory make its own pass/fail conclusion?

        As the ISTA standard dictates, it is up to the shipper to determine the level of damage tolerance and acceptable packaging condition. The testing laboratory can advise, but the final decision is up to the business.

        What if I don’t specify anything?

        The report will only describe the current situation. Each party then reads the results in a different way, and the end customer can apply their own criteria — often stricter criteria than you think.

        Is this criterion the same for every procedure?

        Regarding requirements, it is the same: every procedure requires the shipper to determine. As for the content no similar, because it depends on the product and not on the process code — the criteria for wooden cabinets and the criteria for electronic circuit boards cannot be shared.

        Do I have to submit a set of criteria to ISTA?

        No. This is an agreement between the business, the testing unit and the end customer. The more clearly the criteria are stated in the test records, the less disputes later.

        Can these four criteria replace the content of the standard?

        No. They only add parts that the standard intentionally leaves open. Test sequence, test levels and equipment must still comply with the official standard.

        7. Conclusion

        The ISTA standard does not have a pre-defined definition of “pass” — it is up to the shipper to determine the acceptable product damage tolerance and packaging condition. The most concise way is to concretize those two things into four points (definition of damage, tolerance, inspection method, packaging condition), write in the test request right from the time of scheduling, and ask the testing laboratory to write verbatim in the report.

        Doing this takes about an internal meeting. If you don’t do it, every time you get a test result, you’ll spend even more time debating what it means.

        References

        The full standard should be searched and ordered directly from ISTA. Below are the public sources used for reference when compiling the article:

        Original source: overviews of ISTA Series 1 (1A, 1C, 1E, 1G, 1H) — section “Scope / Product Damage Tolerance and Package Degradation Allowance”, © International Safe Transit Association.

        Related articles:


        Talk to us


          Disclaimer and IP acknowledgement

          This article is an explanatory content compiled by us for the purpose of introducing and disseminating knowledge. Article is not a translation, copy, abridgement or replacement of the parent standard, and is not evaluated, approved or sponsored by ISTA (International Safe Transit Association)..

          The entire content of ISTA standards is copyrighted by the International Safe Transit Association, Inc. (East Lansing, Michigan, USA) — All rights reserved. ISTA® and the ISTA logo are registered trademarks of the International Safe Transit Association, Inc.; Mentioned in this article are for guidance purposes only and do not imply any affiliation, partnership or sponsorship.

          Article content For reference only; Before applying for any purpose — testing, evaluation, certification or commercial decision-making — the reader should refer directly to the original ISTA document (the most complete and up-to-date version) and consult an accredited testing facility when necessary.

          When performing testing, it is mandatory to use the official, current version of the standard, obtained directly from ISTA. We do not redistribute ISTA materials in any form. Information in this article may be out of date with the current version of the standard.

          See more: Copyright Policy & Disclaimer by ticforall.com.
          What Is the ISTA Standard? How to Choose the Right Transport Packaging Test (3A, 6-Amazon, ASTM D4169)

          0
          Cover image of article «What is ISTA standard? Guide to choosing the right shipping packaging test (3A, 6-Amazon, ASTM D4169)» — illustration of shipping packaging testing according to ISTA standards

          A shipment leaving the port in perfect condition can still reach customers in the US with dented boxes and cracked products. Between those two points were dozens of loading and unloading times, many hours of shaking on the truck, falls from the sorting conveyor belt and low pressure in the aircraft cabin. ISTA® standards exists to simulate that exact sequence of risks in the test room — before you close the container.

          This article redraws the map of the entire ISTA series system, delves into the two tests that Vietnamese businesses encounter the most (3A and 6-AMAZON.COM), compares with ASTM D4169, and provides logic for selecting standards by distribution channel. The goal is to help you Choose the correct test code — is not a substitute for purchasing the official standard from ISTA when conducting testing.

          What is ISTA?

          ISTA (International Safe Transit Association) is a non-profit association headquartered in East Lansing, Michigan, USA. ISTA develops and promulgates transportation packaging performance test procedures, and operates the program. testing laboratory certification so that test results in different laboratories can be compared.

          Point to understand right from the beginning: ISTA not a legal regulation. There are no US or EU laws that require goods to meet ISTA. ISTA’s weight comes from the demand side — major retailers, e-commerce platforms and shipping carriers include it in their supplier contracts. With a Vietnamese factory, the ISTA report is usually conditions for being on shelves, is not an export license.

          Map of the ISTA standards series

          Ảnh minh hoạ phần «Bản đồ các series» của bài «Tiêu chuẩn ISTA là gì? Hướng dẫn chọn đúng bài transport packaging testing (3A, 6-Amazon, ASTM D4169)»
          Illustration of the «Map of series» section.

          ISTA classifies test procedures according to simulation level actual shipping, not product type. To understand this logic is to understand much of the system.

          SeriesNameNatureWhen to use?
          1 Series
          1A, 1B, 1C, 1D, 1E, 1G, 1H
          Series 1 Overview (1A–1H)
          Non-Simulated Integrity
          (Non-simulated integrity)
          Test the fundamental mechanical durability of the product + packaging combination. Does not simulate a real route.Design refinement at the R&D stage. Fastest, fewest steps. Make an internal comparison between packaging options.
          2 Series
          2A, 2B, 2C
          Partial Simulation
          (Partial simulation)
          1 Series platform plus controlled conditioning and calculated compression testing step.Goods for export and international distribution but not clearly defined specific transport channel.
          3 Series
          3A, 3B, 3E, 3F, 3H
          +Project 3K, 3L, 3M, 3N, 3P
          General Simulation
          (General simulation)
          Reproduces motion, force and damage sequence based on actual data of each individual transport channel.Once you know the distribution channel clearly. This is the level most widely accepted by major retailers.
          4 Series
          4AB
          Enhanced Simulation
          (Advanced simulation)
          The web application generates a customized test plan, following a user-defined delivery risk profile.When the distribution route is specific, it does not match any 3 Series items.
          6 Series
          6-AMAZON.COM SIOC & Over Boxing, 6-SAMSCLUB
          Member Performance
          (Performance by member)
          Built by an ISTA member (retailer / carrier), reflecting their own operating infrastructure.When selling, choose the correct procedure; items within Series 6 are not interchangeable.
          7 Series
          7D, 7E
          Development
          (Development testing)
          Only the temperature aspect is evaluated. Do not measure impact, vibration or compression.Insulation packaging, cold chain, pharmaceuticals. Always have to combine with a Series 1/2/3 procedure to create a full assessment.

          Some notable updates in ISTA’s current catalog:

          • 6-FEDEX-A and 6-FEDEX-B are no longer part of the ISTA 6 Series tests. If customer or consulting documents still cite FedEx-A/B, ask again.
          • Project 3M Simulate packaged goods shipped internationally from manufacturing facilities in the Asia-Pacific region to distribution centers (DCs) or fulfillment centers (FCs) in the US — a typical route for a Vietnamese factory.
          • Project 3L Generic simulation for goods entering an e-commerce retailer’s fulfillment center, not tied to a specific retailer.
          • Project 3P exclusively for parcel delivery systems in India; 3N for full vehicle transport (FTL) within Europe.

          Quick choice: which distribution channel does your product use?

          Ảnh minh hoạ phần «Chọn nhanh» của bài «Tiêu chuẩn ISTA là gì? Hướng dẫn chọn đúng bài transport packaging testing (3A, 6-Amazon, ASTM D4169)»
          Illustration of the «Quick Select» section.

          In 3 Series, the difference between codes lies in the distribution channel, not the product type. This is the group that is most easily confused when consulting:

          • 3A — single parcel via courier (UPS, FedEx, DHL…).
          • 3B — cargoes that share trucks with other shippers, multiple destinations (LTL).
          • 3E — goods packed into uniform pallets, traveling in one vehicle to one destination (FTL).
          • 3F — retail packages in mixed multi-SKU pallets, routed by distribution center to retail store.
          • 3H — large container or rack frame, required to be moved by forklift or motorized equipment.
          • 2C — furniture (case goods): if this is the right industry, 2C is almost always the default choice because the vibration spectrum and compression load have been individually calibrated.

          Three questions separate 3B, 3E and 3F: is the goods combined with another shipper (→ 3B)? Have you packed an entire pallet for a destination (→ 3E)? Or are LCL cargoes placed on mixed pallets at DC (→ 3F)? Note that 3F requires significantly more samples than other processes — which should be factored into the budget from the beginning.

          ISTA 3A — most common test for parcel shipments

          ISTA 3A applies to single package weighing 70 kg (150 lb) or less, sent via parcel delivery system by road or air. ISTA uses the 70 kg mark specifically for 3A (other articles convert 150 lb to 68 kg) because this is a common division point in international parcel systems.

          The test divides the parcel into parts four shapes, each type has its own test sequence:

          • Standard — all packages that do not fall into the three lower groups.
          • Small — small and light packages, tested in a collection bag with inserts, properly simulating a small collection courier.
          • Flat — flat bales, the shortest edge is very small compared to the next edge.
          • Elongated — the bale is long, the remaining two sides are very small compared to the longest side. If the bale is both flat and long, try the Elongated group.

          In essence, 3A combines the following groups of tests into a consecutive series on the same sample: temperature-humidity conditioning (mandatory in room conditions, optional in controlled climate chamber); two drop shock tests, in which the next phase includes the situation of falling on an obstacle bar; Try random vibration according to two different spectrums, with and without overburden on the top of the bale; option vibrate under low pressure conditions pitch simulation — this tests the sealing ability of lids, taped edges, and primary packaging; With the Flat and Elongated events, there are additional spells fall and rotate and concentrated impact; and finally leak test Required if the product is liquid.

          Regarding model number: ISTA request run the process once with one sample, but recommended two or more samples for fragile or liquid-containing goods, and five or more runs with a new sample each time are recommended for statistically significant results.

          Three detailed articles for each distribution channel: 3A — parcel, 3B — transshipment cargo (LTL) and 3E — full truckload (FTL).

          An often overlooked point: Pass/fail criteria are defined by the consignor himself before testing, is not regulated by ISTA. You must determine in advance what constitutes product damage, acceptable tolerance levels, methods for evaluating product condition after testing, and allowable levels of packaging deterioration. ISTA also recommends determining and recording the paper weight of corrugated cardboard — if the weight changes, even though it remains the same durability class, retesting is recommended.

          ISTA 6-AMAZON.COM — with businesses selling on Amazon

          6-AMAZON.COM system is available two separate articles, it’s easy to get confused:

          • 6-AMAZON.COM-SIOC (Ships in Own Container — “shipped in the original container”): goods are sent by the supplier to Amazon’s fulfillment center (FC) and then delivered directly to the customer via parcel or LTL, no Packaged extra by Amazon.
          • 6-AMAZON.COM-Over Boxing: retail goods placed by Amazon in an external shipping box with an insert, then sent via parcel to the customer.

          SIOC divided into eight groups of bales, Type A to Type H, based on four criteria: Amazon’s outbound delivery method (parcel or LTL), FC handling (off the floor or on separate pallets), package volume, and product group. The grouping framework is as follows:

          • Type A, B, C — delivered via parcel, handled on the floor, divided into three increasing weight levels (under 23 kg; 23 to under 45 kg; from 45 kg and up).
          • Type D, E — delivered via LTL, processed off the floor, divided by weight and circumference of the package.
          • Type F — shipped via LTL, goods received and delivered on separate pallets.
          • Type G, H — separately for TVs and monitors, separated by parcel or LTL. Amazon separates this group because of its perishable nature and different handling.

          Girth is calculated by: length + 2 × (width + height). This is the parameter that often determines which Type your bale falls into — you should measure it before contacting the lab.

          These two packaging directions are different in principle and cannot replace each other: one side has a force-absorbing outer shell, the other side does not. See detailed comparison article: How are SIOC and Over Boxing different? Choose the right test for products sold on Amazon.

          Compared to 3A, SIOC’s heavy Types add test groups that a pure parcel problem does not have: try tilting, simulate horizontal clamping force (clamping simulation) for bales whose width is within the specified range, Vertical compression retains force, inclined or horizontal impact, and only Type F is available Simulate forklift operations. This reflects real operations: goods in Amazon’s FC are handled by tongs and forklifts, not just dropped and vibrated.

          Model number requirements are also significantly different from 3A: Fragile goods require five samples and all must pass; Non-fragile goods require a sample. TVs and monitors are classified as non-fragile thanks to having their own Type, thereby reducing the number of models.

          A note on scope: Amazon’s packaging programs — FFP (Frustration-Free Packaging), SIPP, PFP and the APASS lab network — are regulatory on Amazon’s side, no belongs to ISTA, and changes relatively frequently. The ISTA test serves as technical input for those programs. Please verify applicable requirements directly on your account’s Seller Central or Vendor Central, as conditions may vary by market and time to time.

          ISTA or ASTM D4169?

          This is the most frequently asked question after “What is ISTA”. The core difference lies in philosophy:

          • ISTA provide the pre-packaging process: choose the correct article code (3A, 6-AMAZON.COM-SIOC Type A…), the lab runs in the correct order. Fewer options, but easier to compare between parties and stick with ISTA certified lab systems.
          • ASTM D4169 is one frame: the user selects the distribution cycle (e.g. DC-13 for parcel / domestic air routes) and the assurance level (assurance level I, II or III), then this frame generates the corresponding test schedule. More flexible, but requires the editor to clearly understand the actual distribution route.

          In fact, Select according to the party requesting the report, do not choose according to technical preferences. E-commerce platforms and retailers often refer to ISTA specifically by name. The medical device industry often uses ASTM D4169 (especially DC-13), sometimes in conjunction with ISTA 3A. If the contract doesn’t say so, ask the buyer before scheduling a test — re-doing a test set because it’s out of order costs much more than a confirmation email.

          Also know: many component tests in ISTA procedures are based on the respective ASTM or ISO methods (free fall, random vibration, compression, tilt impact, rotational drop…). The two systems are not opposed at the method level — they differ at the test-scenario level.

          What is an ISTA certified testing laboratory?

          ISTA certifies two groups of labs: Transport Testing Laboratory (vibration, impact, compression) and Thermal Testing Laboratory (insulated shipping container).

          According to ISTA’s announcement, the shipping lab certification process includes: becoming an ISTA member; declare equipment and capacity through the Lab Certification portal, with a short video of less than one minute for each operating device; ISTA review in about 15 working days and issue certification exactly the tests that the lab’s equipment can meet; Recertification every two years, or whenever the device is relocated.

          Important point for service buyers: ISTA certification is associated with each test code, not issued to labs in general. A 3A certified lab is not necessarily 6-AMAZON.COM-SIOC Type F certified. Always ask for a specific protocol list before signing a contract.

          For thermal labs, the requirements are stricter: there must be at least one employee with Certified Thermal Professional Level II certification, and must pass on-site audit performed by ISTA’s independent auditors; The certification cycle is two years from the date of the audit.

          Is there a laboratory in Vietnam that performs ISTA testing?

          Yes — and more than most in the industry think.

          Look up directly on the phonebook Find a Lab of ISTA, filtered by country “Viet Nam” (implemented on September 27, 2026), the system returns 32 establishments, in it 19 belongs to the Commercial group (receive testing for external parties) and 13 belong to the In-House group (only tested for that business’s own products). Facilities are distributed in Ho Chi Minh City, Hai Phong, Bac Ninh, Hai Duong, Ha Nam and some other localities.

          Within the Commercial group are familiar international names, with a list of certified protocols spanning from 1 Series to 3 Series and all eight Types of 6-AMAZON.COM-SIOC. In-House groups are mainly internal labs of electronics factories and packaging manufacturers. In other words, Vietnamese businesses can absolutely try ISTA domestically, it is not necessary to send samples to China or America.

          Recommended practice: don’t trust the list in any article — including this one. The ISTA directory changes over a two-year recertification cycle. Please check for yourself ista.org → Design & Testing → Find a Lab or Services, filter by country and according to the correct protocol code you need, then call for verification directly with the lab.

          Cost and time

          ISTA not announced publicly testing price list, and commercial laboratories in Vietnam also do not list prices on the website. Any specific numbers spread on forums should be considered unauthentic references.

          What can be said for sure is variables Push up costs and time:

          • Test code. The 6 Series and 3 Series have significantly more steps than the 1 Series; Series 1 is the fastest and cheapest group in the entire system.
          • Model number. Fragile goods according to SIOC require five samples and all must pass; 3F also requires a higher number of samples than the average.
          • Optional blocks. Controlled climate chamber, low-pressure vibration — choosing it or not will change both price and schedule.
          • Specialized equipment. Forklift test tracks, horizontal clamping machines, low-pressure chambers — not every lab has them, and this affects schedule wait times.

          The only way to get a real number: send at least two labs a package description (dimensions, weight, product type, distribution route, required post code) and request a parallel quote.

          One variable that is often overlooked when scheduling and estimating is climate control time: most processes require 12 hours of preconditioning in the lab, and if controlled conditioning is chosen, a common figure is 72 hours per condition. See article Climate control before packaging testing: 12 hours or 72 hours? — which contains a table of conditions and two exceptions (3K and 7D).

          Where to start?

          1. Ask the buyer Which code do they need — ISTA or ASTM, which series, which Type? This is a decisive step, not a formal step.
          2. Read the free overview of that code on ista.org to understand the test sequence and equipment needed. If you want to conduct an official test, you must Buy the full standard version from ISTA (free for members) — the overview is not enough to run tests.
          3. Define your own pass/fail criteria in writing, prior to sample submission. Lab does not do this for you.
          4. Run internal screening with a 1 Series article if possible, so as not to waste official testing capacity on a design that is bound to fail.
          5. Select lab Have the correct protocol code certified, and package the sample to be sent carefully — ISTA requires the sample to arrive at the lab in perfect condition: close the outer bag tightly, or let the lab repackage it with new materials.
          6. Take photos and record configurations, materials, and structures of the product and packaging tested. Seemingly insignificant differences are often the cause of discrepancies in results between tests.

          A passing ISTA test does not guarantee a shipment will never fail — ISTA states that the test level is based on general data and may not be representative of a particular distribution system, and some conditions such as humidity, pressure or unusual handling may not be covered. Its real value is turning a vague question (“Is this packaging okay?”) into a repeatable measurement that both the factory and the buyer can read and trust.

          References

          • ISTA’s official test procedure documents (ISTA Test Procedures & Projects), full version — used to compare the scope of application and test sequence structure of each code.
          • ISTA — Test Procedures (list of current series and projects, accessed September 27, 2026)
          • ISTA — Getting Started with Design & Testing and Guidelines for Selecting and Using ISTA Test Procedures and Projects
          • ISTA — Certify your Lab (testing laboratory certification process)
          • ISTA — Find a Lab or Services (lab directory, search by country and by protocol)
          • ASTM International — ASTM D4169, Standard Practice for Performance Testing of Shipping Containers and Systems
          • ISTA — Procedure 3A — Overview and equipment required (free overview published by ISTA; not enough to conduct testing)

          Talk to us


            Disclaimer and IP acknowledgement

            This article is an explanatory content compiled by us for the purpose of introducing and disseminating knowledge. This article is not a translation, copy, abbreviation or replacement of the original standard, and is not reviewed, approved or sponsored by ISTA (International Safe Transit Association).

            Related articles

            The entire content of ISTA standards is copyrighted by the International Safe Transit Association, Inc. (East Lansing, Michigan, USA) — All rights reserved. ISTA® and the ISTA logo are registered trademarks of the International Safe Transit Association, Inc.; Mentioned in this article are for guidance purposes only and do not imply any affiliation, partnership or sponsorship.

            The content of the article is for reference only; Before applying for any purpose — testing, evaluation, certification or commercial decision-making — the reader should refer directly to the original ISTA document (the most complete and up-to-date version) and consult an accredited testing facility when necessary.

            When performing testing, it is mandatory to use the official, current version of the standard, obtained directly from ISTA. We do not redistribute ISTA materials in any form. Information in this article may be out of date with the current version of the standard.

            See more: Copyright Policy & Disclaimer by ticforall.com.
            Two Laboratories, Two Different Results: Why?

            0
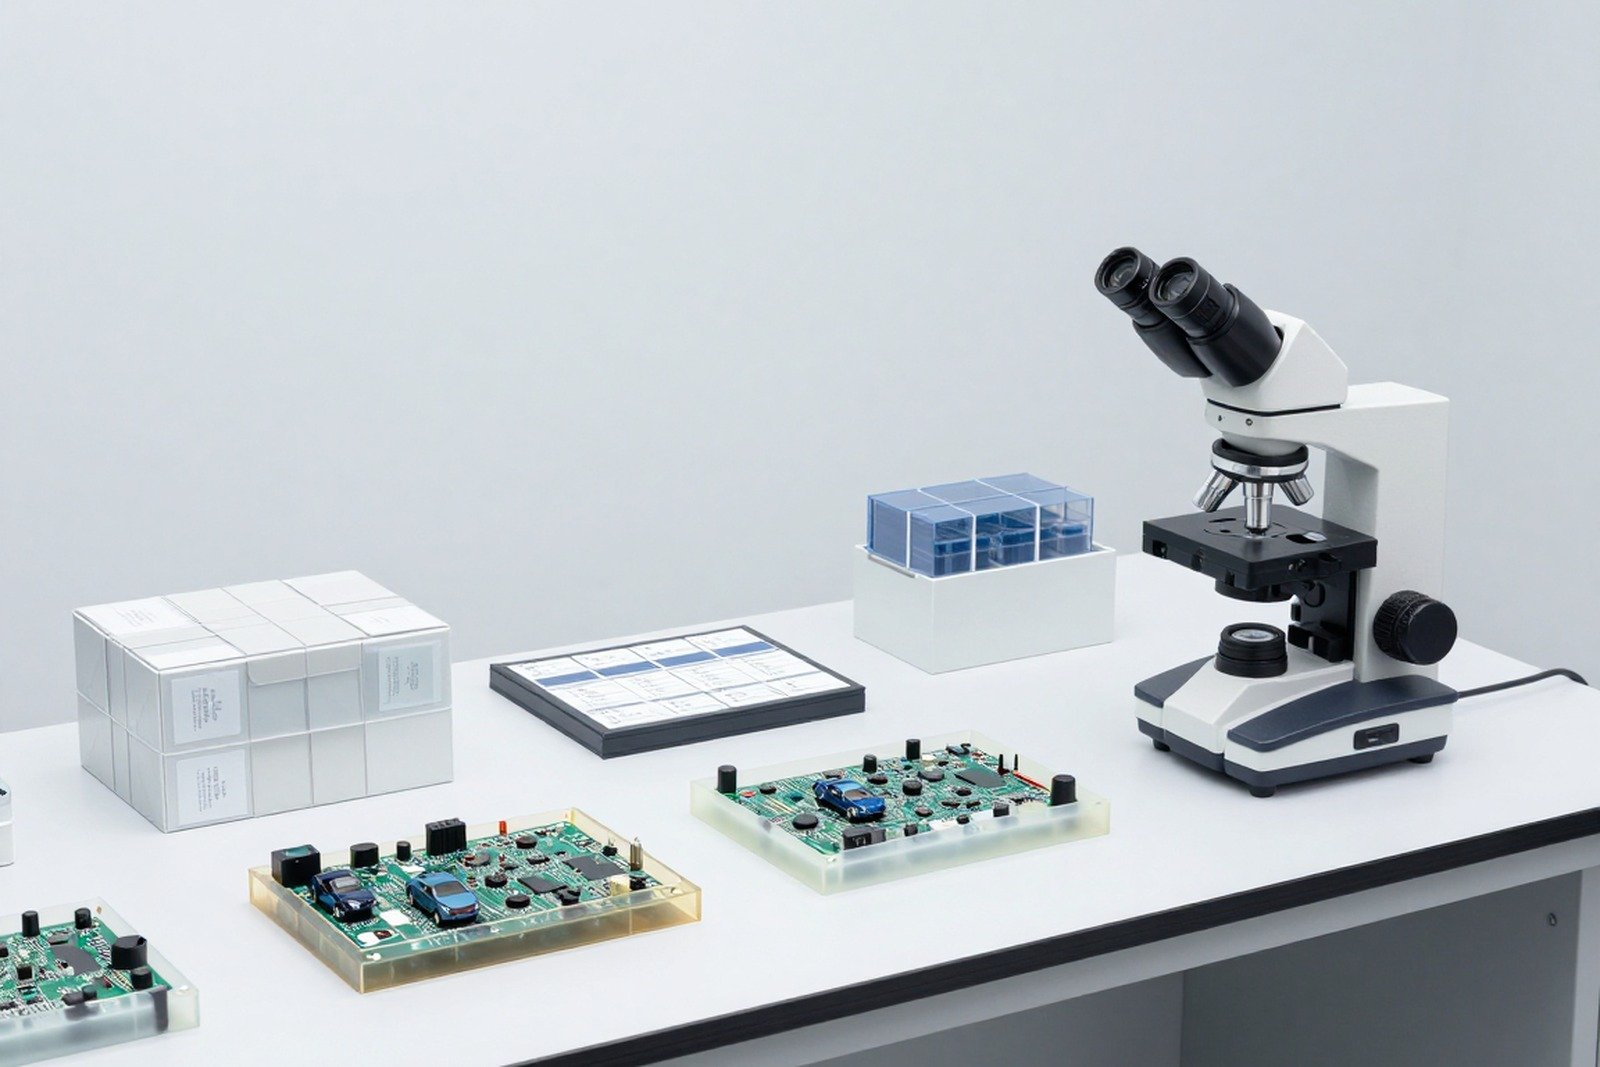
            Two sets of plastic molded circuit board samples placed side by side on a laboratory table with a microscope and measuring equipment - cover image of two laboratories testing two different results

            A familiar situation: the factory sends the same batch of samples to two testing laboratories, and receives two different conclusions. One laboratory said the solder joint was good, the other said the void exceeded the limit. Before concluding that either laboratory is wrong, it is important to understand that most of this difference comes from method, not from capability.

            This article reviews six common sources of variation, how to identify them, and how to synchronize results between two laboratories.

            1. Why can the same sample give different results?

            Cross section is a plane sampling method. The results depend on where the plane is located, the depth of observation, how it is measured and how it is interpreted. All four can vary between two laboratories without either of them doing anything wrong.

            2. Six common sources of difference

            Source of difference Influence on results How to recognize
            Cutting position Cutting through the centre of the ball row differs from cutting off-centre, giving a different shape and size Compare the cutting location diagram recorded in the report
            Cutting direction Perpendicular cutting versus oblique cutting gives different sizes and shapes Compare cutting direction with component layout
            Grinding depth Deep grinding can erase the intermetallic layer or reach another layer Compare the details observed between the two sets of images
            Measurement method Measuring with a ruler on the photo is different from measuring with software, the errors are different Check the scale and measuring tools stated in the report
            Reference-point calculation Same data but different reference points, different percentage results Check the reference-point definition in the methods section
            Interpretation of criteria The same image can be read as pass or fail Compare applicable standards and quality levels
            Two sets of plastic molding samples placed side by side on the analysis table
            The same batch of samples but two different cutting positions can lead to two different conclusions.

            3. Location and cutting direction

            This is the largest and least noticed source of variation. With BGA components, the cross section passing through the center of the row of balls will give a symmetrical ball shape; An off-centre cross section will show a distorted shape, and any measurement will be skewed with it.

            For through-hole boards, cutting along the hole axis shows the entire length of the plating; Cutting at an angle will cut the plating into an ellipse and make the measured thickness inaccurate.

            Principle: The report must clearly state the cutting location and direction, with a diagram. Without these two pieces of information, it is impossible to compare the two results.

            4. Grinding depth and thin-layer condition

            The intermetallic layer and thin plating layer can be gradually erased by grinding. Two laboratories grinding to different depths will see two different pictures of the same solder joint: one side still shows the intermetallic strip, one side has lost it.

            How to check: request a report clearly stating which grinding steps were used and to what depth, with photos of each step if possible. If one side reports loss of intermetallic layer, it is necessary to check whether it is the result of over-grinding or whether the solder joint genuinely lacks bonding.

            5. Measurement method and reference plane

            Factor The two laboratories may differ How to synchronize
            Measuring tool Ruler on photo compared to photo measurement software Unify tools and require scales in photos
            Measurement point Measure at the thickest point versus measure at a representative point Define measurement points in writing
            Reference-point calculation Calculated from the pad surface versus from the solder thickness Clearly state the reference points in the method section
            Number of measurements Single measurement versus repeated measurement and averaging Specify the minimum number of measurements
            Rounding Rounded to two decimals versus rounded to whole numbers Specify the rounding convention
            Cross-sectional image with scale and digital measuring instruments on screen
            Without the scale in the photo, the numbers in the report cannot be independently verified.

            6. Interpretation of criteria

            Even if two laboratories have the same data, the conclusions may still be different if the applied criteria are different. Common causes:

            • Apply different standards to the same product type.
            • Apply the same standards but different quality levels (product classes).
            • One party applies internal criteria that are stricter than the reference standard.
            • One party interprets the criteria according to the customer’s intended use.

            This is not a technical error but a difference in scope of application. In a dispute, this is often the point that needs to be clarified first.

            7. How two laboratories can align

            1. Written agreement: clearly state the cutting location, cutting direction, standards, quality levels, benchmarks and measuring tools.
            2. Use a zone map: divide the board into zones that correspond to the two laboratories so each one cuts at the same locations.
            3. Exchange photos before concluding: Compare images at the same magnification before comparing conclusions.
            4. Check suspicious marks: If one side sees defects that the other side does not see, request grinding again at a lighter step.
            5. Run periodic round-robin comparisons: With regular partner laboratories, periodic comparison of results helps reduce method differences.
            Two sets of analytical samples and method documents are placed on the desk
            Most of the differences between the two testing laboratories are resolved by agreeing on methods before agreeing on conclusions.

            8. When is a difference a sign of a real problem?

            Not all differences are due to method. There are three worrying differences:

            • Same cutting position, same depth, but different results: suggests the sample preparation process is problematic on one side.
            • The results are unusually different between many samples: Suggests sample quality is not consistent, possibly due to production batch.
            • One laboratory consistently gives dramatically different results: suggests that the party’s criteria or processes are not suitable for the purpose of the assessment.

            9. Frequently asked questions

            Which laboratory should we trust?

            Don’t choose on gut feeling. You should ask both to provide photos, benchmarks and applicable criteria, then compare directly. In most cases you will find either an omission or a different criterion applied.

            How can this be prevented from the start?

            Agree in writing on the following elements: cutting location, cutting direction, standards, quality levels, benchmarks and measuring tools. This step takes little time but greatly reduces disputes.

            What if one laboratory reports a much larger void?

            Check the cutting position and observation depth first. Void varies markedly with the cutting plane so differences in cutting position can explain most of the difference.

            Do we need a third party to arbitrate?

            Should be done when the two laboratories cannot resolve it themselves and the value of the dispute is large. The third party needs all samples and method information from both sides.

            Is any laboratory considered a reference?

            There is no universal standard for all cases. It is essential that both parties have a verifiable process and apply the same agreed criteria.

            10. Conclusion

            When two laboratories give two different results, the most common cause is a difference in method — cutting location, grinding depth, datum or interpretation criteria — rather than professional error.

            Four things to do: request a report that clearly states the cutting location and direction; Compare photos before comparing conclusions; agree on reference points and measuring tools in writing; and conclude that there is a capability problem only when both sides use the same method and still get different results.

            References

            • IPC-TM-650 Method 2.1.1 — Microsectioning.
            • IPC-A-610 — Electronic Assembly Acceptance Criteria.
            • J-STD-001 — Requirements for electrical soldering and electronic assembly.
            • IPC-6012 — Technical requirements for rigid printed circuit boards.

            Related articles


            Talk to us


              Disclaimer

              This article is an interpretive content compiled by us; not legal advice. Enterprises need to compare relevant documents/standards verbatim before applying them to specific products.

              See more: Copyright Policy & Disclaimer by ticforall.com.
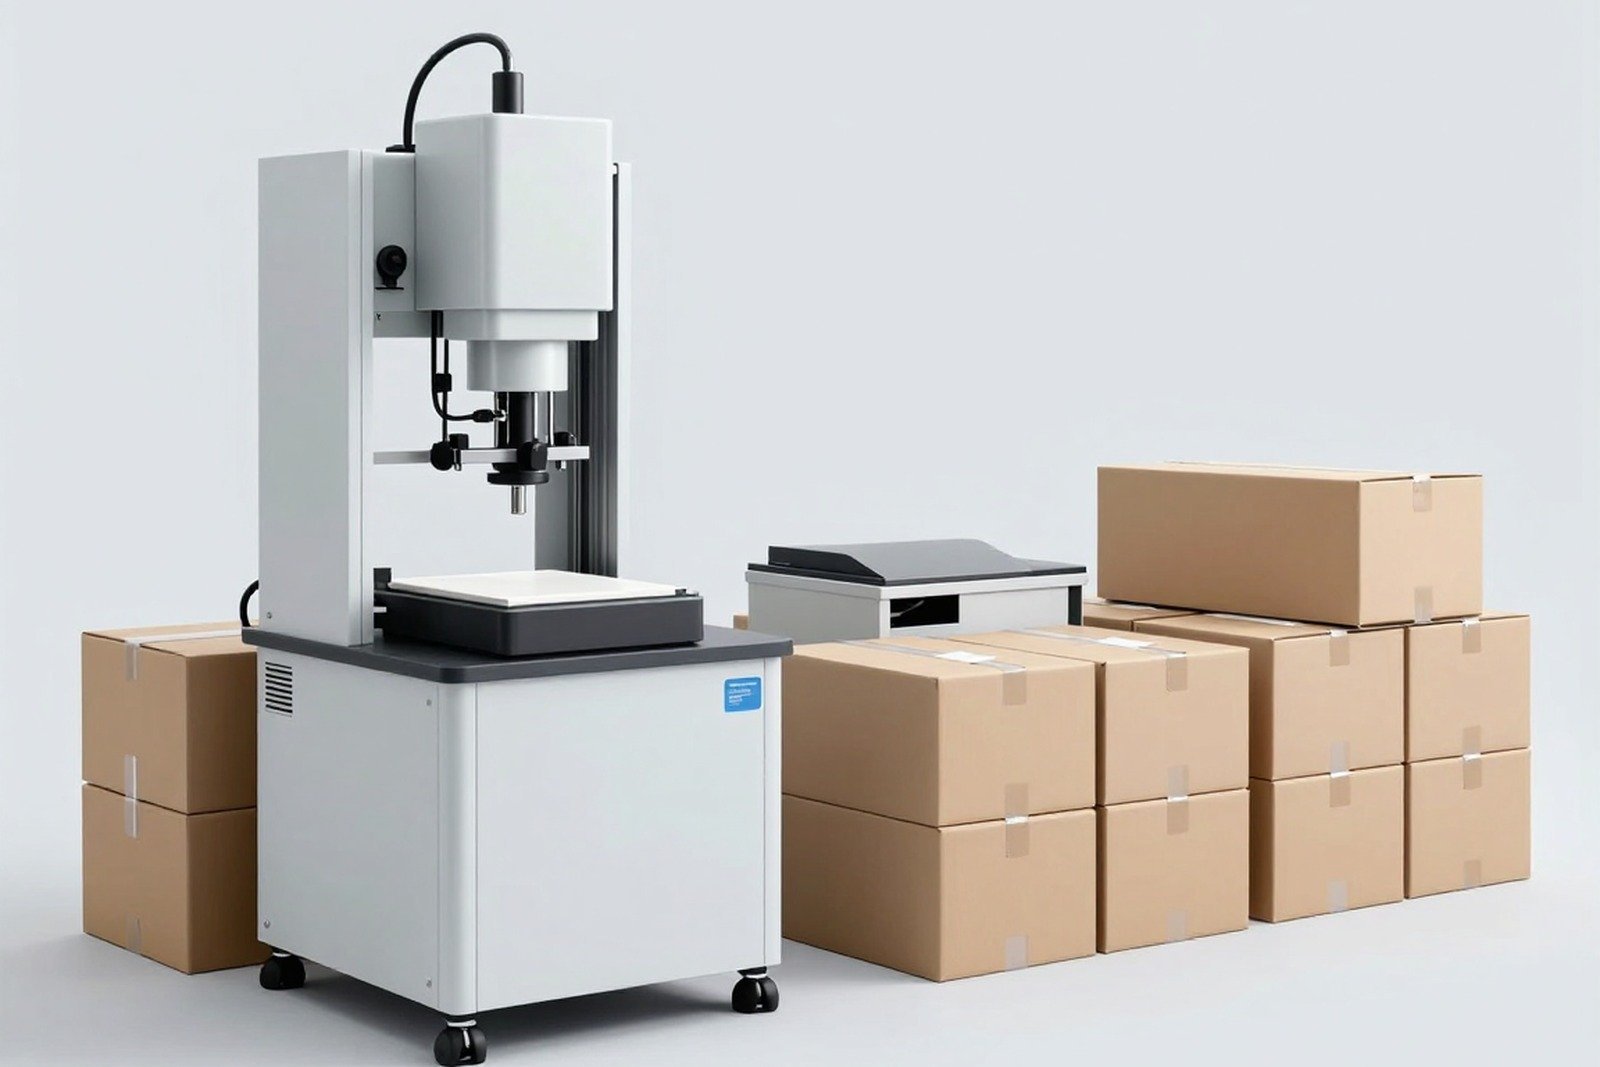
              Cross Section in Automotive and Medical Devices: How the Requirements Differ

              0
              Quality room with molded plastic automotive and medical electronic circuit boards, microscopes, and labeled sample boxes — cover photo of cross section of automotive and medical devices

              Cross sections are technically the same in every industry. But when products go into cars or medical devices, the requirements around that testing change dramatically: frequency, records, traceability, and how to handle changes.

              This article compares the requirements between the two industries and what businesses need to prepare before joining their supply chains.

              1. Why are these two industries more demanding?

              • Consequences of error: Defective products can harm users, not only causing loss of revenue.
              • Long life cycle: The product must operate stably for many years, even in harsh conditions.
              • Traceability: every batch of material and every process change must be traceable.
              • Strict change control: Small changes also require re-evaluation and may require customer approval.
              • Quality records may be audited: results must be verifiable, not merely passing at the time of testing.

              2. Comparing the requirements of the two industries

              Aspect Automotive industry Medical equipment
              Main focus Reliable under continuously varying vibration, temperature and humidity User safety and stability of measurement or treatment function
              Quality system requirements Often associated with the automotive industry’s quality management system and customer requirements Often associated with medical device quality management systems and product approval requirements
              Change control There is a strict change approval process, associated with documents proving process capacity Have a revalidation process when materials, processes or suppliers change
              Test records Should be stored per batch according to an agreed control plan Needs to be kept in product records and can serve inspection
              Environmental testing Heat, vibration, moisture, corrosion cycles Heat and humidity cycling, electrical safety testing and biological stability where relevant

              Common point: both industries require test results to be attached to records and verifiable. A cross-sectional image without information about the sample, method and application level will not have enough value in the file.

              3. How this affects the way cross sections are prepared

              Aspect Common consumer products Automotive or medical
              Frequency of testing Follow the first batch and when there is a problem According to the agreed periodic plan, including any changes
              Sample retention Usually not kept Samples and records should be retained for the committed period
              Control sample Recommended Usually a mandatory requirement
              Interpretation of results Can be flexible according to experience Needs to be linked to approved criteria and application levels
              Photo documentation Photo with description The photo has a scale, clearly stating the magnification, position and cutting direction
              Analysis table with plastic molded circuit board model and laboratory microscope
              Test specifications remain constant, but documentation requirements and frequency vary markedly between industries.

              4. Which changes require re-evaluation?

              This is a question that businesses often miss and is also the source of many complaints. Groups of changes that often need re-evaluation:

              1. Material change: Solder paste, flux, coatings, board materials.
              2. Supplier change: circuit boards, components, soldering consumables.
              3. Change equipment or process parameters: temperature profile, speed, pressure.
              4. Change of pad or stencil design: directly affects solder paste volume and solder joint shape.
              5. Change of production site or switch of supply chain.

              With each change, it is necessary to re-determine whether the cross section results are still valid or not. In many cases, retesting is a condition to prove that the new process still meets requirements.

              5. Documentation requirements

              • Sample information: Product code, batch number, manufacturing date, sampling location.
              • Test information: cutting position and direction, sample preparation method, magnification.
              • Results: The image has a scale, measurement results, and conclusions for each indicator.
              • Applicable criteria: agreed standards, quality levels, and thresholds.
              • Device information: Calibration status of measuring equipment and microscope.
              • Implementer and approver.
              Weld cross-section photo with scale and notes on the analysis table
              Photos with scales and complete notes are a condition for results to be usable in quality records.

              6. What to prepare before joining a supply chain

              1. Build internal processes based on standardized test methods, not based on personal experience.
              2. Establish a sample-retention rule and stipulate the retention period committed to customers.
              3. Build report forms with enough information fields to meet documentation requirements.
              4. Maintain equipment calibration and save documents.
              5. Train image reviewers to distinguish real defects from artefacts caused by sample preparation.
              6. Agree with customers on criteria, quality levels and thresholds before production.
              Sample boxes, labels and trays line the laboratory shelf
              A numbered sample-retention system helps answer later questions without having to re-prepare a sample.

              7. Frequently asked questions

              Is periodic cross-sectioning mandatory?

              Usually specified in a quality control program agreed with the customer. With important products, periodic inspection is a way to prove that the process is still under control.

              Are old results still valid after a material change?

              No. Changing materials is one of the most common causes of changes in solder joint properties, so re-evaluation is needed.

              Do we need to keep the samples after cutting?

              It is advisable to retain at least the mounted cross-section sample. Retained samples help answer questions that arise later without having to re-prepare a sample.

              Can a small factory meet the documentation requirements?

              Yes, if suitable processes and forms are in place. Most requirements concern consistency and verifiability, not equipment scale.

              Where should we start?

              By standardising the sample-preparation process and developing reporting forms. These are the two factors that most affect the ability of both industries to meet documentation requirements.

              8. Conclusion

              Cross section technical requirements do not vary across industries. What changes is the stringency of frequency, documentation, traceability and change control. With automotive products and medical devices, test results must be verifiable, not just correct.

              Four things should be done: standardize sample preparation procedures; Build a report form with enough information fields; Maintain sample and calibration records; and clearly identify which groups of changes need to be reevaluated so that they are not missed.

              References

              • IPC-TM-650 Method 2.1.1 — Microsectioning.
              • IPC-A-610 — Electronic Assembly Acceptance Criteria.
              • J-STD-001 — Requirements for electrical soldering and electronic assembly.
              • IPC-6012 — Technical requirements for rigid printed circuit boards.

              Related articles


              Talk to us


                Disclaimer

                This article is interpretive content compiled by us; it is not legal advice. Enterprises need to compare relevant documents/standards verbatim before applying them to specific products.

                Learn more: Copyright Policy & Disclaimer at ticforall.com.

                Technical Cleanliness Testing per VDA 19.1: 7 Steps from Cleanliness Specification to Result

                0
                Technical cleanliness testing laboratory with ultrasonic tank, extraction chamber with nozzle, vacuum filter and microscope - cover photo VDA 19.1

                The previous article explained What is VDA 19 / VDA 19.1. This article tackles the hardest part for manufacturers: How to measure technical cleanliness — and why two laboratories can publish two different numbers on the same component.

                Most important principle: VDA 19.1 is not a single “test” but a chain process — specification setting, sample preparation, extraction, membrane filtration, analysis, expression of results. A mistake at any step, the final number is difficult to protect. The following content presents general principles according to VDA 19.1 and ISO 16232:2018; Specific parameters (solvent volume, membrane pore size, particle count threshold) must be compared verbatim to the agreed standards and norms.

                1. Process overview

                Step Content Open questions to settle first
                1 Define cleanliness requirements and limits What to measure, on what surface, what criteria?
                2 Sample preparation and blank control How many components, packaging and shipping?
                3 Particle extraction Wet or dry extraction, which parameters are fixed?
                4 Membrane filtration Which membrane filter, how to weigh?
                5 Particle analysis Count, classify size, determine particle type?
                6 Reporting and evaluation of results Report according to what, compared to what standard?
                7 Records and reports Are measurement conditions documented well enough to be reproducible?

                Because the results depend on the entire chain, results can only be compared between two laboratories using the same procedure; If the procedure is different, it must be clearly stated where the difference is.

                2. Step 1 — Define requirements and the cleanliness specification

                • Detailed scope: Measure the entire part or just the functional area (seal surface, oil chamber, contact area)? This decision changes the numbers a lot.
                • Method and solvent: must be recorded in the norms, because the same details but extraction by spraying different from ultrasonic vibration will give different results.
                • Target: total particle mass; number of particles in each size class; number of metal particles; Classified by particle type.
                • Threshold: deduced by the customer and supplier from function, clearance, voltage and usage conditions — there are no universal limits for all components.
                • How to standardize: by detail, by surface area or by volume — must match the format that the norm is using.
                • Sampling: Number of parts in a sample, which batch/shift/machine to take and how often.

                If there is no norm, the measurement only has a relative comparison value (for example, comparing before – after changing the cleaning process), it cannot be concluded as satisfactory or unsatisfactory.

                3. Step 2 — Sample preparation and blank control

                This is the most overlooked step, and also the biggest source of error:

                • Blank value: measure the “dirtiness of the procedure itself” — solvents, tools, vessels, room air. The blank value must be a large enough distance smaller than the sample result, otherwise you are measuring the background and not the details.
                • Sample packaging: The material is clean, sealed, does not produce particles due to friction; Do not use reusable packaging. Attached is a label with component code, date, time and condition upon receipt.
                • Human: In the laboratory, gloves, masks, and clean gowns are required — fibers from clothing, hair, and paper are common sources of contamination.
                • Environment: work on a table with clean air flow or in a controlled area; Sampling equipment must be cleaned and inspected.
                • Control sample: There should be reference details or saved samples to distinguish process errors from product errors when results are abnormal.

                4. Step 3 — Extracting particles from the component

                The goal is to remove particles from the part surface into a medium to be measured — liquid or gas. Commonly used groups of methods:

                • Wet extraction: pressurized liquid spray directed at the surface to be tested; pouring or rinsing over parts; ultrasonic vibration in liquid tank; soak and stir; Pressure extraction for closed channels inside the part.
                • Dry extraction: Use air flow to blow over or through the part and then collect particles on the filter membrane — suitable for parts that cannot withstand solvents, parts in the form of air ducts or connectors; This is the group of methods added in the February 2026 revision.
                • How to choose: based on detailed geometry (seams, internal cavities, planes), materials, hard-to-reach surfaces and hazardous particle locations in actual use.
                • Parameters must be fixed: ray direction and distance, pressure, time, solvent volume and temperature, number of iterations. Changing a parameter changes the result.

                Two opposing mistakes to avoid: under-extraction (too few particles collected, an artificially clean-looking result) and over-extraction (the protective layer peels off and new particles are generated). A reasonable process is one that most closely simulates how particles are entrained and moved under real working conditions.

                Buồng chiết tách kim loại có các vòi phun hướng vào chi tiết và ống dẫn trong suốt dẫn dung dịch sang bình thuỷ tinh
                Jet extraction in a closed chamber: jet parameters must be fixed and recorded with results.

                5. Step 4 — Membrane filtration

                • The entire extract is passed through a filter membrane; Particles are retained on the membrane surface. The membrane must have a pore size small enough compared to the smallest particle layer to be analyzed, otherwise the most dangerous particle group will be “lost”.
                • Rinse the tank and pipeline to avoid retaining particles along the way; Too strong a suction force can pull the particle through the membrane.
                • Weight scale: Weigh the membrane before and after filtration on a microbalance, under controlled conditions (stabilization time, humidity, same procedure).
                • Effects of solvents: Volatile solvents can leave a residue on the membrane and be miscalculated as particle mass — this is why the blank value for the entire process, including the solvent, must be measured.
                • Preserving the membrane after filtration: Place in a sealed box to prevent further dust from settling before scanning and counting.
                Bộ lọc màng chân không với phễu thuỷ tinh giữ màng lọc trắng trên bình hút trong phòng thí nghiệm sạch
                Membrane filtration: particles are retained on the membrane for mass weighing and subsequent counting.

                6. Step 5 — Particle analysis

                Once the membrane filter is in place, analysis answers three questions: How much, what size, what type.

                • How much: particle mass (from membrane balance difference) — general indicator but does not distinguish between particle nature.
                • Which size: Count and classify particles according to size range using an optical microscope, often combined with image analysis to increase repeatability.
                • What type: Distinguish between metallic particles, non-metallic particles and fibers. When you need to make a firm conclusion about the material, use SEM/EDX — VDA 19.1 February 2026 requires uniform material classes for standard analysis, so that every laboratory classifies “metals – minerals – fibers” the same.
                • Particles smaller than 50 µm: higher resolution is needed, counting errors increase and the risk of particle loss when preparing larger samples — version 2026 describes this more closely because small particle groups are risky with high-density electrons.

                The technical meaning is very different: of the same mass, lint can clog the path and metal particles can cause short circuits — so just a total mass number is often not enough to draw a conclusion.

                Kính hiển vi quang học có hộp petri chứa màng lọc trắng trên bàn thí nghiệm sạch
                Counting and classifying particle size on the filter membrane: step to decide the conclusion value.

                7. Step 6 — Reporting and evaluating results

                • Presentation according to standards: according to the agreed standards and standardized form (according to details, surface area or volume). Changing standardized units is the most common way to compare results.
                • Subtract the blank value: Reported results must clearly state what the baseline value is and whether it has been corrected or not.
                • Pass/fail rating: only makes sense when compared to the norm of that component itself. There is no universal “pass” threshold.
                • Uncertainty: Detection limits, weighing errors, particle counting errors, and sample representativeness must all be stated; “no particle detected” just means below the detection limit.
                • Abnormal results: repeat or expand the number of samples before concluding on the lot; Compare control samples to eliminate process errors.

                8. Why the 2026 edition stresses process monitoring

                Final inspection only detects problems when the product is finished. The new revision shifts the focus to process monitoring — tracking cleanliness with data right at the point of particle generation. Groups of activities are often deployed in parallel:

                • Background and environmental controls: blank values of measuring process, compressed air quality, assembly area, cleaning equipment.
                • Periodically check representative details right at the line, instead of just checking at the end.
                • Check arrival of goods from the supplier, compare the norms in the contract and drawings.
                • Reference details: Periodically challenge the part with known contamination levels to test the capabilities of the test procedure itself.
                • Analyze when problems occur: Returns, repeat errors that are difficult to explain — trace the source of particles along the chain of people, equipment, materials, environment, methods.

                9. Common mistakes

                • Compare the results of two laboratories with different extraction procedures and conclude that one is wrong.
                • Do not measure or report baseline values, causing the results to reflect the dirtiness of the measurement process.
                • Packaging, transporting or manipulating samples results in additional particle contamination; Only use a single sample to draw conclusions for the whole batch.
                • Compare two standardized results in different units, or compare the total mass with the particle count norm.

                10. Choosing a test laboratory: what to ask

                • What is the extraction procedure, with a written description and according to which VDA 19.1 / ISO 16232 version?
                • What type of filter is used and what is the smallest particle size threshold that can be counted?
                • How is the blank value measured, and is it corrected for the reported results?
                • Is there particle type analysis (SEM/EDX) when needed, and what classification method is applied?
                • What is the scope of laboratory capacity accredited (if ISO/IEC 17025 accredited)?
                • Does the report include sufficient measurement conditions, number of details, sample packaging and extraction parameters for reproducibility?

                Enterprises should attach drawings/norms and ask the laboratory to confirm in writing: what process will be used, what will be standardized, and what is the blank value.

                11. Frequently asked questions

                Is one sample a single component or several?

                Depending on the level. Testing a single component yields results for that component; Combining multiple parts into one sample helps evaluate batch trends but does not indicate which parts are dirty. There are two different ways to answer two questions, so it must be finalized before sending the form.

                Is cleanliness testing destructive?

                Extraction is not intended to destroy the part, but the part gets wet, may change the surface or be contaminated with solvents, so it is usually not returned to production. With expensive parts, it is necessary to agree in advance who will bear the sample costs.

                Does “no particles detected” mean the component is perfectly clean?

                Are not. The results are always linked to the detection limits of the procedure: filter type, smallest size count threshold, blank value. Below those levels, measurements are inconclusive.

                12. Conclusion

                Measuring technical cleanliness is a chain process, not a test. Three points determine the quality of the result: clear specifications, a fixed and documented extraction, and blank value control.

                Regarding trends, VDA 19.1 February 2026 adds dry extraction, more closely describes testing for particles smaller than 50 µm and standardizes SEM/EDX analysis, while pushing process monitoring to a central role. The practical direction for businesses is to move from “checking to respond”. Control particle sources right during the production process.

                References

                • VDA QMC — Volume 19.1: Inspection of Technical Cleanliness, 3rd revision, February 2026.
                • ISO 16232:2018 — Road vehicles — Cleanliness of components and systems.
                • ZVEI — instructions Technische Sauberkeit in der Elektrotechnik.
                • CleanControlling GmbH — technical documentation on cleanliness monitoring and methods (VDA 19.1 version 2026).
                • Fraunhofer Institute IPA (Stuttgart) — thematic document on technical cleanliness (TecSa).

                Related articles


                Talk to us


                  Disclaimer

                  This article is an interpretive content compiled by us; not legal advice. We do not have the original VDA 19.1 / ISO 16232, so the article is based on public sources listed in the “Referencess” section; Specific technical specifications must compare verbatim with standards and norms agreed with the customer.

                  See more: Copyright Policy & Disclaimer by ticforall.com.
                  What Is VDA 19? VDA 19.1, VDA 19.2 and ISO 16232:2018 in Technical Cleanliness Testing

                  0
                  Technical cleanliness laboratory with metal extraction chamber, membrane filtration table, microscope and metal parts on white tray - cover photo VDA 19.1

                  In the automotive and electronics industries, there are batches of components that are returned not because of a wrong dimension or wrong material, but because a particle of dirt smaller than a human hair lands exactly on a sensitive spot. To control that risk, the German automobile industry developed a set of documents VDA 19 — technical cleanliness: how to determine, measure and accept the level of particulate contamination on “functionally influential” parts.

                  At present the set of documents comprises: VDA 19.1 (check – analyze) and VDA 19.2 (assembly), running in parallel with the international standard ISO 16232. VDA 19.1 alone has gone through many revisions, the latest being 3rd revision of February 2026 — version in effect.

                  1. What is technical cleanliness?

                  Technical cleanliness is the level of particulate contamination of a part or system small enough so as not to cause functional impairment in the short and long term. “Clean” here does not mean absolutely clean — no component is absolutely clean — but rather so clean that the remaining particles do not cause harm for the correct function of that component. This unavoidable contamination is often called residual dirt particles (Restschmutz).

                  The problem only emerges as functional tolerances shrink: valve clearances are smaller, electrical connections are closer together, voltages are higher. A metal particle of a few tens of micrometers between two contacts can cause a short circuit; Hard particles in the oil line cause pump wear.

                  Chi tiết kim loại đã gia công đặt trên khay trắng sạch cạnh thước cặp điện tử và đèn lúp trong phòng thí nghiệm độ sạch kỹ thuật
                  Technical cleanliness only makes sense when associated with a specific detail and its specific function.

                  2. What is VDA 19 and who publishes it?

                  VDA stands for Verband der Automobilindustrie, the German Association of the Automotive Industry. Its technical documents are issued by VDA QMC (Quality Management Center) and published within the same system as familiar publications such as VDA 6.3 or FMEA AIAG & VDA.

                  The VDA 19 set originates from real damage cases: since the early 1990s, anti-lock braking systems (ABS) and direct diesel injection systems have proved highly sensitive to residual dirt particles, prompting manufacturers to standardise how cleanliness levels are set. The TecSa industry alliance was founded in 2001 and is chaired by the Fraunhofer IPA Institute (Stuttgart).

                  • VDA 19, version 1 (2004): Establish extraction methods, analytical methods and how to document results.
                  • VDA 19 part 2 – VDA 19.2 (version 1, 2010): Shifting focus to the assembly environment: factory, logistics, people and assembly equipment.
                  • VDA 19.1 (revised version, May 2015): Clearly separate the testing and analysis part from VDA 19.2 (assembly).
                  • VDA 19.1 (3rd revision of February 2026): Current version, fully reviewed from February 2023 to May 2025.

                  3. How do VDA 19.1 and VDA 19.2 differ?

                  The two documents complement each other, solving two halves of the same problem:

                  Content VDA 19.1 VDA 19.2
                  Focus Check and analyse sampled components in the laboratory Clean production, clean assembly, environmental control
                  Question answered “How many particles on the component, of what type, what size?” “How to prevent particles from entering or being generated in the procedure?”
                  Results Define cleanliness limits and report measurement results Clean zones classified by level, preventive measures by stage

                  VDA 19.2 divides clean zones by level: uncontrolled area (SaS0), clean area (SaS1), medium clean room (SaS2) and clean room (SaS3) — clean room level refers to the ISO 14644 standard set. This is the basis for designing the factory according to product cleanliness requirements.

                  4. How do VDA 19.1 and ISO 16232:2018 relate?

                  ISO 16232, launched in 2007, is the corresponding international version of VDA 19, and thanks to the participation of the German mirror subcommittee, two sets of documents were developed to compatible with each other. ISO 16232:2018 consolidates the content into one document: “Road vehicles — Cleanliness of components and systems”.

                  The scope of ISO 16232:2018 is also the actual scope of work:

                  • Regulations required Apply and file Method for determining particulate contamination on components and systems that affect the function of road vehicles.
                  • Used for: initial inspection, incoming and outgoing goods inspection, quality control and monitoring processes related to cleanliness (cleaning, surface treatment, assembly).
                  • No Applies to: filmy contamination such as oil and grease; Non-quantifiable methods (visual inspection, wiping with a towel); operating fluid characteristics.
                  • Do not set a limit value for a specific component or system. The required level of cleanliness depends on the part itself, the system containing it, the conditions of use and technological capabilities; The document has an appendix with instructions for deducing limits.

                  In fact, requirements are often stated directly in drawings or customer’s internal standards (many automakers and Tier 1 have their own standards using VDA 19.1/ISO 16232 as the basis). If the customer does not specify, both parties should agree in writing before testing – the worst thing is to have different understandings of the extraction method, because different methods give different numbers on the same part.

                  5. What does VDA 19.1 specify?

                  1. Cleanliness specification: Allowable levels of contamination, tied to specific measurement methods — there is no universal norm.
                  2. Extraction method: How to remove particles from the surface of the part, using liquid or gas.
                  3. Membrane filtration: Collect the extracted particles on the filter membrane for weighing or screening.
                  4. Analysis: Determine particle mass, number of particles according to each size class and particle type.
                  5. Display results: Uniform presentation of norms and results in the quality chain, so that “clean codes” on drawings can be compared between suppliers.
                  6. Conditions to ensure results: Control background values, laboratory environment, equipment and personnel capacity.
                  Đĩa màng lọc trắng có các hạt nhỏ nằm rải rác đặt trong hộp petri trên bàn thí nghiệm inox sạch
                  The filter is the “image” of the measurement: mass and number of particles by size class are read from here.

                  6. What harm do particles cause — and why electronics matter too

                  Groups of particles are often distinguished: lint, fiber, non-metallic particles, metallic particles and abrasive particles (corundum, sand, glass beads). Traditionally, technical cleanliness has focused on particles in the 15–1,000 µm range; The 2026 revision puts greater emphasis on describing and testing particles smaller than 50 µm.

                  With mechanical components, dirty particles cause jamming, abrasion, and blockage of paths. With circuit boards and electrical and electronic components, the damage mechanism is different but no less serious — so the German Electrical and Electronics Industest Association (ZVEI) has its own guidelines on technical cleanliness in electrical engineering:

                  • Conductive metal particles: bridge between two points of different potential → short circuit, discharge; Over time, the particles oxidize, causing the conductivity to change.
                  • Non-metallic particles and fibers: Increased surface polarity, stronger hygroscopicity; In the presence of moisture or condensation may result electrochemical migration (ECM) and leakage current between high-density component pins.
                  • High voltage equipment (electric vehicles, power electronics): The requirements are much stricter — the conductive particle size must be less than half of the circuit’s minimum electrical distance and must not violate the safe air/creep clearance.
                  Bo mạch điện tử trần có giắc kết nối đặt trên khay thí nghiệm trắng cùng nhíp gắp và đèn lúp
                  With high-density circuit boards and high-voltage devices, small conductive particles are enough to cause functional errors.

                  7. What is new in the February 2026 revision of VDA 19.1?

                  According to the official publication description of VDA QMC, this revision (implemented from February 2023 to May 2025) sets the main goals:

                  • Add new dry extraction methods and analytical techniques — expands inspection capabilities for components that cannot be extracted with liquids (gas components, connectors).
                  • Keep standard analysis so that results can be compared between laboratories, At the same time, it allows specialized testing for each problem within a defined requirements framework.
                  • More accurately describes the testing of particles smaller than 50 µm — groups of particles that were previously often outside the normal counting range but are very dangerous for high-density electrons.
                  • Standard SEM/EDX analysis with uniform material layers — so that the determination of “is this particle a metal, a mineral, or a fiber” reaches the same conclusion in every laboratory.

                  Notably, the new version is not only for laboratory use but is also suitable for quality assurance, design – development and supplier management; direction Monitor cleanliness according to the procedure (instead of just final testing) is pushed to a more central role.

                  8. Which manufacturers need to care?

                  • Automobile component manufacturers: pumps, valves, injectors, brakes, gearboxes, bearings, sensors, electronic modules — groups of components that influence function.
                  • Manufactured houses and Tier 1: must receive clean product from the supplier and maintain cleanliness up to the point of installation.
                  • Electronics and electric vehicle businesses: high-density circuit boards, connectors, power electronics — susceptible to conductive and lipophilic particles.
                  • Enterprises exporting to EU/Germany: Requirements often come from the customer’s internal standards, using VDA 19.1 as the basis.
                  • The factory is handling the problem: Repeated errors that are difficult to explain, goods returned after end-of-line inspection — cleanliness analysis and particulate material identification are traceability tools.

                  9. Common misconceptions

                  • “Cleanliness means not seeing dust” — the eye can only see particles from a few dozen micrometers or more, while the error threshold of electronics can be much smaller.
                  • “Just reach ISO 14644 and you’re done” — the cleanroom class only describes the environment, saying nothing about the particles located on details. If you want to prove that parts are clean, you must measure them in detail.
                  • “Just a total volume number” — particle mass does not differentiate between metal particles and lint; In many cases, particle type analysis is required.

                  10. Frequently asked questions

                  Is the 2015 edition of VDA 19.1 still valid?

                  The February 2026 version, revised 3rd, is the current version. However, if the customer still writes “VDA 19.1 (2015)” on the drawing, that is the standard and method agreed upon by both parties – need to agree again in writing before changing the version.

                  Does VDA 19.1 set particle limits per component type?

                  No. Neither VDA 19.1 nor ISO 16232:2018 assign limits to a specific component. Limits are established by the customer and supplier based on function, clearance, voltage and conditions of use.

                  Where do suppliers in Vietnam encounter VDA 19.1?

                  The most common is when foreign customers submit requests with drawings, or when the factory has to investigate repeated errors; Next is when preparing to evaluate the supplier and need to demonstrate particle control capabilities.

                  11. Conclusion

                  VDA 19 is the German auto industry’s way of turning “cleanliness” from a feeling into a measurable technical criterion. VDA 19.1 takes care of the inspection – analysis part, VDA 19.2 takes care of the assembly – environment part, and ISO 16232:2018 is the compatible international version.

                  Three things to remember: cleanliness standards are tied to each detail and do not have a general threshold; Results are only meaningful when associated with the agreed extraction method; and with electronics – electric vehicles, particles smaller than 50 µm are the risk area being focused on in the February 2026 revision. The next step is to choose the right method — the accompanying article content.

                  References

                  • VDA QMC — Volume 19.1: Inspection of Technical Cleanliness. Particulate contamination of functionally relevant automotive components, 3rd revision of February 2026.
                  • VDA QMC — Volume 19 Part 2: Technical Cleanliness in Assembly, version 1, 2010.
                  • ISO 16232:2018 — Road vehicles — Cleanliness of components and systems (scope of application section and appendix guiding the construction of limits).
                  • ZVEI — instructions Technische Sauberkeit in der Elektrotechnik (technical cleanliness in electrical engineering).
                  • Fraunhofer Institute IPA (Stuttgart) — thematic document on technical cleanliness (TecSa).
                  • CleanControlling GmbH — technical documentation and newsletter on VDA 19.1 2026 release.
                  • Wikipedia (German) — article Technische Sauberkeit (overview with citations).

                  Related articles


                  Talk to us


                    Disclaimer

                    This article is an interpretive content compiled by us; not legal advice. We do not have the original VDA 19.1, so the article is based on public sources listed in the “Referencess” section; Enterprises need to compare the verbatim standards and internal standards of customers before applying them to specific products.

                    See more: Copyright Policy & Disclaimer by ticforall.com.
                    Pass/Fail Criteria After Environmental Testing and Interim Functional Checks

                    0
                    Test bench in test room with gray electronics housing, digital multimeter and test leads

                    An environmental test report can say “pass” or “fail” in just one line — but for that conclusion to be valid, the pass criteria must be defined.beforewhen trying. Otherwise, the conclusion is just an opinion.

                    This article covers how to determine pass/fail criteria after environmental testing, how to arrange functional testing between steps, and what items are often missing from records.

                    1. Why pass/fail criteria must be defined before testing

                    Three practical reasons:

                    • Avoid favorable interpretations.After seeing the results, both the seller and the buyer tend to interpret it in the direction they want.
                    • Guaranteed reproducibility.Two different laboratories must reach the same conclusion on the same sample.
                    • Ensure comparability.Results between tests, suppliers, and design versions can only be compared when the criteria are the same.

                    2. Three points of inspection

                    Time Purpose Notes
                    Before the test sequence Set up comparison benchmarks: appearance, function, electrical parameters Required. Without a baseline, deterioration cannot be concluded
                    Between steps (in a sequence) Determine which step caused the failure Depending on the goal: to serve design analysis, it should be done; Qualitative tests can be combined
                    While testing under extreme conditions Detects faults that only appear at temperature/humidity extremes Some tests require continuous monitoring or measurements under specified conditions
                    After testing and recovery Final conclusion according to passing criteria Must comply with specified conditions and recovery time
                    Kỹ thuật viên kiểm tra mẫu và ghi nhận kết quả trong phòng thử nghiệm
                    Checking before testing is an indispensable step: all deterioration conclusions are based on this comparison benchmark.

                    3. Classifying results to write the criteria

                    Type Examples How to treat it in the criteria
                    Serious damage Fire, smoke, insulation breakdown, loss of safety functions, permanent deformation Not acceptable in any case
                    Loss of function Fails to start or to perform its function during or after the test It is necessary to define which functions are mandatory and which are secondary
                    Parameter drift Increased leakage current, decreased sensitivity, deviation of parameters out of tolerance Need specific numerical thresholds and measurement conditions
                    Mechanical damage Cracks, loose screws, plastic deformation, coating peeling Needs a defined accept/reject boundary, with reference photographs
                    Appearance defects Slight discolouration, minor scratches, surface marks Usually accepted, but boundaries must be clearly stated
                    Temporary phenomenon Error occurs at extreme temperatures but recovers automatically Need to stipulate: accept, or must self-recover within X time

                    Important point: criteria are only valid when adhered totest, conditions, timing and measurement methodsspecifically. “Not damaged” is an unverifiable statement.

                    4. How to write a verifiable pass criterion

                    A good criterion answers four questions: what to test, how to measure, what threshold, and when.

                    Vague criteria Verifiable criteria
                    The product still works normally At all regulatory testing times, the product performs all 6 functions in table F; no functional errors under test conditions; The measured parameters are within the tolerances of the technical specification
                    Not damaged After testing, there are no visible cracks on the shell surface when observed at the specified magnification; All screw joints have tightening torque within the allowable range; There are no signs of fluid leakage
                    Humidity does not affect the product After the humidity test, the insulation resistance and leakage current measurement results are within the threshold of the technical specification sheet; There is no flashover phenomenon
                    Thiết bị đo tham số điện và đồng hồ đo trong phòng thử nghiệm
                    Criteria based on measurable parameters are reproducible; Criteria based on emotional evaluation depend on the evaluator.

                    5. Handling borderline results

                    • Record original datawith measurement conditions, no beneficial rounding.
                    • Measure again when in doubt.If the result is close to the threshold, measurement uncertainty should be considered before drawing conclusions.
                    • Distinguish between measurement system errors and product errors.Errors in the measurement system can be mistaken for product defects.
                    • Clearly state the sample status when concluding.Some phenomena only appear under extreme conditions and disappear after recovery — need to be recorded separately.
                    • Don’t change criteria midway.If a change is required, there must be a written record and reason.

                    6. Records to keep when concluding pass or fail

                    Section Minimal content
                    Sample identification Sample code, design version, pre-test status
                    Test Standard number with year, test designation, severity level
                    Test conditions Temperature, humidity, vibration data over time; how to mount; power supply status
                    Functional checks Inspection time, method, measuring equipment, measured parameters
                    Pass criteria The criteria document has been agreed upon, with a confirmation date
                    Evidence Before/after photographs, recorded data, confirmation records
                    Hồ sơ thử nghiệm và biên bản kết quả trên bàn làm việc
                    Pass/fail conclusions can only be defended when accompanied by pre-agreed criteria and original test data.

                    7. Common mistakes

                    • Write the criteria after getting the results,makes the records lose objectivity.
                    • Only visual inspection,do not check functions and parameters.
                    • Measurement conditions are not recorded,making it impossible for readers to compare with the technical specifications.
                    • Use qualifying phraseslike “works well”, “negligible” without definition.
                    • Do not state the acceptance boundaryfor visual defects, leading to disputes upon delivery.
                    • Skip recovery before concluding,misjudging the product’s ability to recover.

                    8. Frequently asked questions

                    Who defines the pass criteria?

                    Usually determined by the requesting party (customer or product owner), based on technical specifications. Manufacturers should be involved to ensure verifiable criteria.

                    Are interim functional examinations mandatory?

                    Not required in all cases. If you need to know which step causes damage, you should check between steps; If only the final conclusion is needed, it can be checked later in the sequence.

                    How to record “pass with minor defects”?

                    Clearly state: meets the agreed criteria, with a description and photo of the defect, so that the recipient can self-assess the level of impact.

                    What if the sample fails due to a fixture error?

                    No conclusion means the sample fails. It is necessary to note the operation error, correct the mounting method and try again according to regulations.

                    May tested samples be sold?

                    Depends on quality policy and customer requirements. Samples that have passed environmental tests may have potential deterioration, so they are usually not used for customer deliveries.

                    Whose signature should the conclusion carry?

                    Depending on the testing room’s process and customer’s requirements. The important point is that the signer must confirm: the sample is received correctly, the test is performed correctly, and the data is truthful.

                    9. Conclusion

                    Pass/fail criteria are the part that determines the value of an environmental test report. Late definition means loss of objectivity; Vague definition means loss of reproducibility.

                    Three things to do: finalize criteria in writing before testing, based on measured parameters instead of feel; Full recording of measurement conditions and original data; and clearly distinguish product errors from operational errors or measurement system errors.

                    References

                    • IEC 60068-1 — Environmental testing: General provisions and guidance.
                    • IEC 60068-2-1, 2-2, 2-14, 2-30, 2-78 — Temperature and humidity tests.
                    • IEC 60068-3-7 — Measurement in loaded temperature chamber.
                    • IEC 60068-3-11 — Uncertainty of climatic conditions in the test chamber.
                    • ISO/IEC 17025 — General requirements for testing and calibration laboratory competence.

                    Related articles


                    Talk to us


                      Disclaimer

                      This article is an interpretive content compiled by us;not legal advice. Enterprises need to compare relevant documents/standards verbatim before applying them to specific products.

                      See more:Copyright Policy & Disclaimerby ticforall.com.